Solving RNA Degradation: A 2025 Guide to Robust Sample Prep for Research and Diagnostics
This article provides a comprehensive guide for researchers and drug development professionals on overcoming the critical challenge of RNA degradation in sample preparation.
Solving RNA Degradation: A 2025 Guide to Robust Sample Prep for Research and Diagnostics
Abstract
This article provides a comprehensive guide for researchers and drug development professionals on overcoming the critical challenge of RNA degradation in sample preparation. Covering foundational mechanisms to advanced applications, it details the enzymatic and cellular pathways of RNA decay, best-practice methodologies for isolation and stabilization, systematic troubleshooting for common issues like low yield and DNA contamination, and validation strategies for clinical and research use-cases. By integrating the latest 2025 technological advances with proven techniques, this guide aims to empower scientists to ensure RNA integrity, thereby enhancing the reliability of downstream gene expression analysis, biomarker discovery, and therapeutic development.
Understanding the Enemy: The Cellular Mechanisms and Causes of RNA Degradation
Frequently Asked Questions (FAQs)
Q1: Why is RNA degradation such a critical issue in genomic research? RNA degradation is a primary concern because it directly compromises the integrity and accuracy of your data. Degraded RNA can lead to biased gene expression profiles, misidentification of splice variants, and false interpretations in downstream analyses like RNA sequencing (RNA-seq). Since RNA is chemically less stable than DNA and susceptible to ubiquitous ribonucleases (RNases), its degradation is a major technical challenge that can invalidate experimental results [1] [2].
Q2: What are the main causes of RNA degradation in my samples? RNA degradation stems from both endogenous and exogenous factors:
- Endogenous RNases: These are naturally present in cells and tissues. Upon sample collection or cell death, these RNases are released and immediately begin to degrade RNA unless rapidly inactivated [3] [2].
- Exogenous RNases: These can be introduced from the user's skin, lab surfaces, or contaminated equipment [2].
- Chemical and Environmental Factors: RNA is susceptible to hydrolysis, especially at elevated temperatures or in the presence of divalent cations like Mg²⁺ that catalyze the breakdown of the RNA backbone [2].
Q3: How can I quickly check the quality of my RNA before a costly experiment? The most common method is using an instrument like a Bioanalyzer or TapeStation to generate an RNA Integrity Number (RIN). A RIN value above 7 is generally considered acceptable for most sensitive applications like RNA-seq [4] [5]. UV spectroscopy can also provide quick metrics; an A260/A280 ratio of 1.8-2.0 indicates minimal protein contamination [3].
Q4: My RNA is degraded. Can I still use it for RNA sequencing? It depends on the degree of degradation and your library preparation method. Standard poly(A) enrichment methods (e.g., TruSeq Stranded mRNA) perform poorly with degraded RNA because they rely on an intact poly-A tail, leading to strong 3' bias [5] [6]. However, ribosomal RNA depletion protocols (e.g., Ribo-Zero) or exon-capture methods (e.g., RNA Access) are more robust and can generate usable data from partially or highly degraded samples, respectively [5].
Q5: What is the best way to store tissue samples for RNA analysis? The best practice is to preserve immediately. Options include:
- Flash-freezing in liquid nitrogen, ensuring tissue pieces are small enough to freeze instantly [3].
- Placing samples in RNA stabilization reagents (e.g., RNAlater, RNAprotect) that permeate the tissue and inactivate RNases, allowing storage at room temperature for limited periods [3] [2]. For long-term storage, keep stabilized or frozen samples at -80°C [2] [7].
Troubleshooting Guide: Preventing and Managing RNA Degradation
Problem: Consistently Low RNA Integrity (Low RIN) After Extraction
Potential Causes and Solutions:
- Cause 1: Slow or Inefficient Tissue Stabilization.
- Cause 2: RNase Contamination During Handling.
- Cause 3: Improper Storage of Purified RNA.
Problem: Biased RNA-seq Data (e.g., 3' Bias) from Partially Degraded Samples
Potential Cause and Solution:
- Cause: Using a poly(A) tail enrichment library preparation method on partially degraded RNA. When RNA fragments, the poly-A tail and 3' end of transcripts are over-represented because the 5' ends are missing [5] [6].
- Solution: If you must use degraded RNA, switch your library prep method. As shown in the table below, ribosomal RNA depletion or exon capture protocols are far more accurate for degraded samples [5].
Performance of RNA-seq Library Prep Kits on Degraded Samples
Table 1: A comparison of different RNA-seq library preparation methods when used with degraded RNA samples. Accuracy is measured by correlation with gold-standard TaqMan qPCR data [5].
| Library Prep Method | Principle | Intact RNA (RIN >8) | Degraded RNA | Highly Degraded RNA |
|---|---|---|---|---|
| TruSeq Stranded mRNA | Poly(A) enrichment | Excellent | Poor performance, strong 3' bias | Not recommended |
| Ribo-Zero rRNA Removal | Ribosomal RNA depletion | Excellent | Good performance even at low input (1-2 ng) | Performance drops significantly |
| RNA Access | Exon capture | Excellent | Good performance | Best performance for highly degraded samples (e.g., FFPE) |
The Scientist's Toolkit: Essential Reagents for RNA Integrity
Table 2: Key reagents and kits used to prevent and manage RNA degradation in the laboratory.
| Reagent / Kit | Function | Example Use Case |
|---|---|---|
| Chaotropic Lysis Buffers (e.g., in PureLink Kit) | Denature and inactivate RNases immediately upon cell/tissue lysis. | Standard first step in most RNA isolation protocols from cells or tissues [3]. |
| RNA Stabilization Solutions (e.g., RNAlater, RNAprotect) | Permeate tissues/cells to stabilize and protect RNA at collection, allowing temporary room-temperature storage. | Collecting tissue samples in the field or lab when immediate processing isn't possible [3] [2]. |
| RNase Decontamination Solutions (e.g., RNaseZap) | Deactivate RNases on lab surfaces, pipettors, and glassware. | Routine cleaning of the RNA workbench before and after experiments [3]. |
| DNase Set (e.g., PureLink DNase Set) | Remove genomic DNA contamination during RNA isolation ("on-column") to ensure pure RNA. | Essential for applications like qRT-PCR where DNA contamination can lead to false positives [3]. |
| PAXgene Blood RNA Tubes | Stabilize RNA in whole blood immediately upon draw by lysing cells and inactivating RNases. | Clinical studies involving blood collection for transcriptomic analysis [8]. |
| TRIzol Reagent | A phenol-guanidine based monophase solution for effective lysis and RNA isolation, especially from difficult samples. | Isolating RNA from tissues high in fats, nucleases, or complex fibrous structures [3]. |
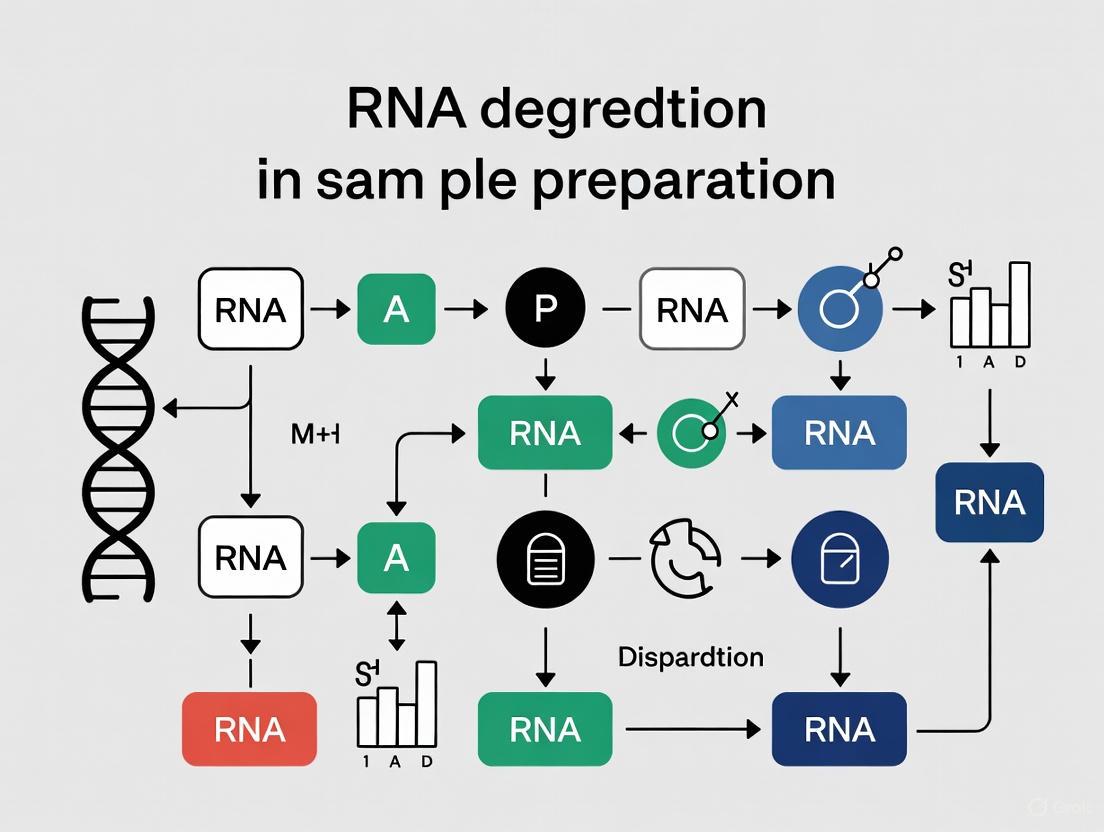
Visualizing the RNA Degradation Challenge and Solutions
The following diagram illustrates the core challenges of RNA degradation and the strategic points for intervention in the experimental workflow.
Diagram 1: A roadmap outlining the causes and consequences of RNA degradation, alongside key intervention strategies to ensure data integrity.
The diagram below summarizes the cellular machinery responsible for RNA turnover, a natural and regulated form of RNA "degradation" that researchers must distinguish from technical degradation.
Diagram 2: Core pathways of mRNA degradation in eukaryotic cells. This regulated process is distinct from unwanted technical degradation but involves machinery that can be activated upon sample collection [1].
In the pursuit of reliable gene expression data and successful downstream applications, researchers consistently face a formidable adversary: the uncontrolled degradation of RNA. This degradation, mediated by a suite of specialized enzymes including RNases, exonucleases, and decapping complexes, represents a significant bottleneck in sample preparation from diverse biological sources. The inherent susceptibility of RNA to these enzymes, coupled with their ubiquitous presence in the environment and within biological samples themselves, can compromise data integrity, lead to false conclusions, and impede progress in both basic research and drug development. This technical support center is framed within a broader thesis that a mechanistic understanding of these degradation enzymes, combined with rigorous, preemptive troubleshooting protocols, is the most effective strategy to solve the pervasive challenge of RNA degradation. The following guides and FAQs are designed to equip scientists with the knowledge to diagnose, prevent, and rectify the most common issues related to enzymatic RNA degradation.
FAQ: Understanding the Degradation Machinery
1. What are the key enzyme families that degrade RNA, and how do they function?
RNA degradation is a controlled process essential for cellular homeostasis, but it becomes a contaminant in experimental settings. The primary enzymes involved are:
- RNases: This broad category includes endoribonucleases that cleave RNA internally and exoribonucleases that degrade RNA from the ends. Their robust nature, with numerous intramolecular disulfide bonds, makes them refractory to many decontamination methods [9]. A key family is the RNase A superfamily (e.g., RNase A, B, C), which are secreted endoribonucleases unique to vertebrates [10].
- Exoribonucleases: These enzymes catalyze the stepwise removal of nucleotides from the 3' or 5' end of an RNA molecule. They are classified by their directionality: 3'→5' exonucleases (like RNase R) and 5'→3' exonucleases (like Xrn1) [11] [12]. In eukaryotes, the major 3'→5' decay pathway is executed by the exosome complex [12].
- Decapping Complexes: These enzymes remove the 5' cap structure of mRNAs, a critical step that exposes the RNA to 5'→3' exonucleolytic degradation by Xrn1. The prevailing model suggests that deadenylation (shortening of the poly-A tail) often precedes decapping [13].
2. Beyond contamination, what are other common causes of RNA degradation during sample preparation?
While RNase contamination is a primary concern, other factors are frequently overlooked:
- Heat-Induced Strand Scission: RNA molecules can undergo non-enzymatic cleavage when heated in the presence of divalent cations like Mg²⁺ or Ca²⁺. This is a chemical hydrolysis event, not an enzymatic one [9].
- Disruption of Endogenous Protection: Cells contain protective mechanisms, such as the ribonuclease inhibitor (RNH1), which binds and neutralizes RNases of the RNase A superfamily. During tissue homogenization and lysis, these protective mechanisms can be disrupted or overwhelmed, leading to rapid RNA degradation [10].
- Repeated Freeze-Thaw Cycles: Each thawing event can activate latent RNases and promote hydrolysis, progressively fragmenting RNA [2].
3. How can I stabilize RNA in tissues rich in endogenous RNases, like pancreas or liver, for translatome studies?
Tissues such as pancreas and liver express high levels of secretory RNases, posing a significant challenge for techniques like polysome profiling that require non-denaturing conditions to preserve ribosome-mRNA interactions. Effective strategies include [10]:
- Rapid Processing: Flash-freeze tissue pieces in liquid nitrogen immediately after dissection.
- Cryogenic Grinding: Use a pre-chilled mortar and pestle or a CryoGrinder system to powder the frozen tissue without allowing it to thaw.
- Potent Lysis Buffers: Use a freshly prepared, chilled lysis buffer containing multiple inhibitors:
- Cycloheximide to freeze translating ribosomes.
- Triton X-100 and Tween-20 for efficient membrane disruption.
- Protease Inhibitors to protect against proteolysis.
- RNasin or similar inhibitors to specifically target RNases.
- DTT to help maintain a reducing environment.
4. Are there RNAs that are naturally resistant to exonuclease degradation, and how is this achieved?
Yes, certain structured RNAs have evolved sophisticated mechanisms to evade degradation, a property some viruses exploit [12].
- Flavivirus Xrn1-Resistant RNAs (xrRNAs): These RNAs from viruses like Murray Valley encephalitis virus form a unique ring-like structure with a pseudoknot. This fold acts as a mechanical brace, physically blocking the entrance to the Xrn1 enzyme's active site and preventing further 5'→3' degradation [12].
- MALAT1 and PAN ENE RNAs: These long non-coding RNAs sequester their 3' poly(A)-rich tail within a stable triple-helix structure. By sequestering the 3' end, they prevent the loading and progression of the 3'→5' exonucleases of the exosome complex [12].
Troubleshooting Guide: Common RNA Degradation Scenarios
Problem: Degraded RNA after Isolation from Cultured Cells
| Symptom | Possible Cause | Solution |
|---|---|---|
| Low RIN value, smeared gel | Introduction of Environmental RNases: From benchtops, pipettors, or non-sterile consumables. | - Decontaminate surfaces and pipettors with an RNase-inactivating solution like RNaseZap [3] [10].- Use certified RNase-free tips and tubes [9]. |
| Low yield, intact RNA in some samples but not others | Inconsistent Lysis: Endogenous RNases not inactivated quickly enough. | - Ensure lysis buffer contains a strong denaturant like guanidinium isothiocyanate [3].- Homogenize cells immediately and thoroughly upon adding lysis buffer. |
| RNA degradation after storage | Improper Storage Conditions: Multiple freeze-thaw cycles or storage in aqueous buffer without inhibitors. | - Aliquot RNA into single-use portions [3] [2].- Store at -80°C in RNase-free water or TE buffer (with EDTA to chelate divalent cations) [9] [2]. |
Problem: Failed Polysome Profile due to RNA Degradation in Primary Tissue
| Symptom | Possible Cause | Solution |
|---|---|---|
| Poor resolution of polysome peaks, shifted profile | Endogenous RNase Activity: Disruption of tissue activates high levels of RNases before RNH1 can neutralize them. | - Optimize lysis buffer with detergents (Triton X-100) and protease/RNase inhibitors [10].- Process tissue aliquots that have been powdered and kept frozen on dry ice [10]. |
| Low A260/A280 ratio | Protein Contamination: Inefficient separation of RNA from protein during isolation. | - Use a phenol-based method (e.g., TRIzol) for difficult tissues [3].- Ensure proper phase separation and avoid the interphase during RNA precipitation. |
Experimental Protocols for Controlling Degradation
Protocol 1: Creating an RNase-Free Workspace and Routine Decontamination
Maintaining an RNase-free environment is the first line of defense. Ambion scientists recommend this schedule [9]:
Daily Practices:
- Use only RNase-free buffers, reagents, and consumables.
- Wear gloves and change them frequently.
- Use barrier pipette tips.
Weekly Practices:
- Thoroughly clean lab benchtops, pipettors, and tube racks with an RNase decontamination solution.
Monthly Practices:
- Test water sources and bench-prepared reagents for RNase contamination.
Protocol 2: Optimal Storage of Purified RNA
Proper storage is critical for preserving RNA integrity over time [9] [3] [2].
- Quantify and Quality-Check: Measure RNA concentration and purity (A260/A280 ratio of 1.8-2.0 is acceptable) and determine the RNA Integrity Number (RIN) if possible.
- Aliquot: Divide the RNA solution into several single-use aliquots to avoid repeated freeze-thaw cycles.
- Choose Storage Buffer: Resuspend or dilute RNA in:
- RNase-free water with 0.1 mM EDTA.
- TE buffer (10 mM Tris, 1 mM EDTA, pH ~7.5). The EDTA chelates divalent cations, preventing metal-catalyzed strand scission [9].
- Store at Low Temperature:
- Short-term (up to 1 month): Store at -20°C.
- Long-term: Store at -80°C.
Data Presentation: Enzyme Properties and Control Schedules
Table 1: Properties of Key RNA Degrading Enzymes
| Enzyme | Type | Directionality | Key Function / Substrate | Inhibitor / Protection Method |
|---|---|---|---|---|
| RNase A Family [9] [10] | Endoribonuclease | N/A | Cleaves single-stranded RNA internally after C and U residues. Secreted; high levels in some tissues. | RNH1 protein, denaturants (guanidinium), RNaseZap |
| RNase R [11] | Exoribonuclease | 3'→5' | Unique ability to degrade through extensive double-stranded RNA structures. | Requires non-denaturing conditions for functional studies. |
| Xrn1 [13] [12] | Exoribonuclease | 5'→3' | Major cytoplasmic exonuclease that degrades decapped mRNAs. | 5' cap structure, specific RNA 3D folds (xrRNAs) |
| Exosome [12] | Exonuclease Complex | 3'→5' | Major nuclear/cytoplasmic complex for 3'→5' mRNA decay and rRNA processing. | 3' poly-A tail, triple-helix structures (MALAT1) |
| Decapping Enzyme (Dcp1/Dcp2) [13] | Hydrolase | N/A | Removes the 5' m7G cap, initiating 5'→3' decay by Xrn1. |
| Frequency | Action Items |
|---|---|
| Daily | Use RNase-free buffers and consumables; use ribonuclease inhibitor proteins in enzymatic reactions. |
| Weekly | Thoroughly clean lab benchtops, pipettors, and tube racks with an RNase decontamination solution. |
| Monthly | Test water sources for RNase contamination. |
| As Needed | Test bench-prepared reagents; clean electrophoresis equipment; use filter pipette tips. |
Visualization of RNA Degradation Pathways
Diagram: Major Eukaryotic mRNA Decay Pathways
The Scientist's Toolkit: Essential Reagents for RNA Integrity
| Reagent / Tool | Function | Key Consideration |
|---|---|---|
| RNase Decontamination Solutions (e.g., RNaseZap) [3] [10] | Chemically inactivates RNases on benchtops, pipettors, and equipment. | Essential for weekly decontamination of the workspace. |
| Guanidinium Isothiocyanate [3] | A powerful chaotropic denaturant that inactivates RNases immediately upon cell or tissue lysis. | A key component in many commercial RNA isolation kits. |
| RNase Inhibitor Proteins (e.g., RNasin) [9] | Proteins that bind to and inhibit specific RNases (e.g., the RNase A family). | Crucial for protecting RNA during enzymatic reactions like RT-PCR and in vitro transcription. |
| RNA Stabilization Reagents (e.g., RNAlater, DNA/RNA Shield) [3] [2] [10] | Aqueous solutions that permeate tissues to stabilize and protect RNA at room temperature for short periods. | Ideal for clinical samples or when immediate freezing is not possible. Incompatible with translatome studies. |
| Chelating Agents (e.g., EDTA) [9] [2] | Binds divalent cations (Mg²⁺, Ca²⁺), preventing metal-catalyzed hydrolysis (strand scission) of RNA. | Should be included in RNA storage buffers (e.g., TE buffer) and certain lysis buffers. |
| Phosphorothioate (pt) Bonds [14] | A synthetic modification of the RNA backbone where sulfur replaces oxygen, conferring resistance to many nucleases. | Used therapeutically and in research; typically 3-6 consecutive pt bonds are needed for full protection from exonucleases. |
RNA turnover is a critical cellular process for regulating gene expression and maintaining RNA integrity. The exosome complex, deadenylation, and the nonsense-mediated decay (NMD) pathway represent core components of the RNA surveillance machinery. Understanding their functions and interactions is essential for diagnosing and troubleshooting issues in RNA-related research and experimentation.
The exosome complex is a multi-protein complex capable of degrading various types of RNA molecules and is present in the cytoplasm, nucleus, and especially the nucleolus [15]. It functions as a 3'-5' exoribonuclease, meaning it degrades RNA molecules from their 3' end, and in eukaryotes also has endoribonucleolytic function, cleaving RNA at internal sites [15]. Deadenylation, the shortening of the mRNA 3' poly(A) tail, is a critical first step in nearly all major eukaryotic mRNA decay pathways and often serves as the rate-limiting step for mRNA degradation and translational silencing [16]. The NMD pathway is an RNA surveillance mechanism that detects and destroys mRNAs containing premature termination codons (PTCs) to prevent the synthesis of truncated proteins [17]. In mammalian cells, this can occur via a cytoplasmic pathway involving accelerated deadenylation [17].
Table 1: Core Components of Major RNA Turnover Pathways
| Pathway | Key Components | Primary Function | Cellular Localization |
|---|---|---|---|
| Exosome Complex | Core ring (6 RNase PH-like proteins), Rrp44/DIS3 (hydrolytic RNase), Rrp6/PM-Scl100 | 3'-5' RNA degradation and processing | Cytoplasm, nucleus, nucleolus |
| Deadenylation | PAN2-PAN3 complex, CCR4-CAF1 complex | Poly(A) tail shortening | Cytoplasm |
| Nonsense-Mediated Decay (NMD) | UPF1, exosome complex, decapping enzymes | Degradation of PTC-containing mRNAs | Cytoplasm, nucleus-associated |
Frequently Asked Questions (FAQs) and Troubleshooting Guides
FAQ 1: Why is my purified RNA degraded, and how can I prevent it?
Cause: RNA degradation can occur due to multiple factors, including ribonuclease (RNase) contamination, improper sample handling, or activation of intrinsic RNA instability pathways [18]. RNA is particularly susceptible to autohydrolysis, where the 2'OH group initiates a nucleophilic attack on the phosphorus atom, cleaving the phosphodiester backbone [19]. This process is catalyzed by both acidic and basic conditions [19].
Solutions:
- Use RNase inhibitors: Employ RNase-free reagents, tips, and tubes during RNA extraction and handling.
- Proper sample storage: Flash-freeze samples in liquid nitrogen and store at -80°C immediately after collection. Use RNA stabilization reagents to maintain RNA integrity during storage [18].
- Control buffer conditions: Maintain neutral pH to minimize self-cleavage through transesterification reactions [19].
- Avoid repeated freeze-thaw cycles: Aliquot RNA samples to minimize degradation.
FAQ 2: How does nonsense-mediated decay (NMD) initiate RNA degradation in mammalian cells?
Answer: Unlike the deadenylation-independent NMD pathway in yeast, mammalian cells exhibit a cytoplasmic NMD pathway where a premature termination codon triggers accelerated deadenylation that precedes decay of the mRNA body [17]. This was demonstrated using transcriptional pulsing approaches that monitor mRNA deadenylation and decay kinetics [17]. When accelerated deadenylation is impeded by blocking translation initiation or expressing dominant-negative mutants of NMD factors like UPF1, nonsense-containing transcripts are stabilized [17].
FAQ 3: What is the relationship between the exosome complex and deadenylation in RNA turnover?
Answer: The exosome complex works downstream of deadenylation to degrade the RNA body after poly(A) tail removal. Following deadenylation, the exosome mediates 3'-5' exonucleolytic digestion of the RNA body [16] [15]. The exosome's activity can be stimulated by cofactors like the TRAMP complex (containing Mtr4p, Trf4p, and Air2p), which adds poly(A) tails to structured RNA substrates, making them better exosome substrates [20]. In yeast, an alternative NMD pathway requires the exosome components Rrp4p and Ski7p for degradation of deadenylated mRNA [21].
FAQ 4: What methods can I use to assess RNA degradation in my samples?
Answer:
- Gel Electrophoresis: The most common method where uncompromised RNA gives tight bands, while degraded RNA results in a smear. Requires ~100 ng of RNA and has limited quantification accuracy [19].
- Nanopore Sensing: A sensitive, quantitative method that can evaluate RNA degradation with single-molecule resolution using as little as 100 pg of RNA. This label-free technique measures current changes as RNA fragments pass through a nanopore, building a fragment size distribution profile [19].
- RNAscope Assay: An in situ hybridization method that allows semi-quantitative assessment of RNA integrity in fixed tissues using a scoring system based on dot counts per cell [22].
Table 2: Comparison of RNA Integrity Assessment Methods
| Method | Sensitivity | Quantitation | Key Advantage | Key Limitation |
|---|---|---|---|---|
| Gel Electrophoresis | ~100 ng | Semi-quantitative | Low cost, simplicity | Low sensitivity, poor quantification |
| Capillary Gel Electrophoresis | >15 pg | Improved quantification | Better resolution than standard gels | Expensive instrumentation |
| Nanopore Sensing | ~100 pg (picogram) | Fully quantitative | Single-molecule resolution, wide concentration range | Specialized equipment required |
| RNAscope | N/A | Semi-quantitative (dot counting) | Preserves spatial information in tissue | Requires specific probes, fixed tissue |
FAQ 5: How can I optimize my RNAscope assay for better results?
Answer: The RNAscope assay is a novel in situ hybridization method for detecting target RNA within intact cells [22]. For optimal results:
- Sample Preparation: Fix samples in fresh 10% neutral-buffered formalin for 16-32 hours [22].
- Proper Equipment: Use the HybEZ Hybridization System to maintain optimum humidity and temperature during the assay [22].
- Controls: Always run positive control probes (e.g., PPIB, POLR2A) and negative control probes (e.g., bacterial dapB) to assess RNA quality and assay performance [22].
- Scoring: Use the semi-quantitative scoring guidelines based on dots per cell rather than signal intensity [22].
Experimental Protocols for Studying RNA Turnover
Protocol 1: Transcriptional Pulsing Approach to Monitor mRNA Deadenylation and Decay Kinetics
Principle: This method creates a homogeneous population of newly synthesized mRNAs, enabling precise tracking of deadenylation and decay over time [16] [17].
Methodology:
- Transient Transcription: Use an inducible promoter (e.g., c-fos or Tet-regulated promoter) to drive a short burst of reporter gene transcription [16] [17].
- Transcriptional Repression: Repress transcription after 30 minutes (for c-fos) or by adding tetracycline (for Tet-system) [16].
- Time-Course Sampling: Collect cytoplasmic RNA samples at multiple time points after repression [17].
- Northern Blot Analysis: Resolve RNA samples to separate polyadenylated from deadenylated species and quantify using gene-specific probes [17].
- Data Analysis: Plot the fraction of polyadenylated RNA versus time to determine deadenylation rates [17].
Applications: This approach demonstrated that nonsense codons trigger accelerated deadenylation of β-globin mRNA in mammalian cells, preceding decay of the RNA body [17].
Protocol 2: Solid-State Nanopore Sensing for Quantitative RNA Degradation Assessment
Principle: Nanopore sensing detects individual RNA molecules as they pass through a nanoscale pore, providing high-resolution size distribution data [19].
Methodology:
- Sample Preparation: Dilute RNA in an appropriate electrolyte solution (e.g., 10 mM Tris-HCl, 1 mM EDTA, pH 7.0) [19].
- Instrument Setup: Apply a voltage across a quartz glass nanopore (10-15 nm diameter) separating two chambers [19].
- Data Acquisition: Measure current blockades as RNA molecules translocate through the pore. Full-length RNA produces deeper current blockades than fragments [19].
- Data Analysis: Fit peak current distributions using maximum likelihood estimation to determine the proportion of full-length versus degraded RNA [19].
Advantages: Requires only picogram quantities of RNA, works with any RNA sequence without labeling, and provides single-molecule resolution [19].
Pathway Diagrams and Visualization
The Scientist's Toolkit: Essential Research Reagents
Table 3: Key Reagents for RNA Turnover Research
| Reagent/Kit | Primary Function | Application Notes |
|---|---|---|
| Monarch Total RNA Miniprep Kit | Total RNA extraction and purification | Includes DNase I treatment option to remove genomic DNA contamination [18] |
| DNA/RNA Protection Reagent | Maintains RNA integrity during sample storage | Essential for preventing degradation between sample collection and processing [18] |
| RNAscope Assay Reagents | In situ hybridization for RNA detection in fixed cells/tissues | Requires specific positive (PPIB, POLR2A) and negative (dapB) control probes [22] |
| Transcriptional Pulsing System (c-fos or Tet-regulated promoters) | Monitoring mRNA deadenylation and decay kinetics | Enables production of homogeneous mRNA populations for turnover studies [16] [17] |
| Protease K | Protein digestion during RNA extraction | Increasing from 5% to 10% may improve RNA yield from challenging samples [18] |
| HybEZ Hybridization System | Maintains optimal humidity and temperature | Required for RNAscope hybridization steps to prevent sample drying [22] |
Foundational Concepts: The Role of the 5' Cap and Poly(A) Tail in mRNA Stability
The 5' cap and 3' poly(A) tail are essential modifications that protect eukaryotic mRNA from degradation and enhance its translation into protein. The 5' cap, a 7-methylguanosine linked to the first nucleotide via a 5'-5' triphosphate bridge, protects the mRNA from 5' to 3' exonuclease degradation, facilitates nuclear export, and is recognized by eukaryotic initiation factors (eIFs) to promote ribosome recruitment and translation initiation [23]. The 3' poly(A) tail, typically 150-250 adenosine residues long, protects against 3' to 5' exonuclease degradation and interacts with poly(A)-binding proteins (PABPs) [23]. These PABPs form a complex with eIFs at the 5' cap, creating a "closed-loop" structure that significantly enhances translation efficiency and mRNA stability [24] [23].
The inherent vulnerability of mRNA lies in the constant threat of exonuclease activity. The core RNA degradation machinery includes enzymes like 5'→3' exonucleases (XRN1), deadenylation complexes (CCR4-NOT, PAN2-PAN3), and the RNA exosome complex that degrades RNA in the 3'→5' direction [1]. The synergy between the 5' cap and poly(A) tail is a critical defense, and the disruption of either structure makes mRNA highly susceptible to rapid decay, which is a primary challenge in RNA therapeutics and sample preparation [1] [23].
Strategic Stabilization: Chemical Modifications of the 5' Cap and Poly(A) Tail
Chemical modification provides a powerful strategy to bolster the natural defenses of mRNA. The table below summarizes key chemical modifications used to enhance the stability of the 5' cap and poly(A) tail, along with their mechanisms and trade-offs.
Table 1: Chemical Modifications for Stabilizing the 5' Cap and Poly(A) Tail
| Modification Type | Location | Key Mechanism of Action | Pros | Cons / Notes |
|---|---|---|---|---|
| Phosphorothioate (PS) | Poly(A) tail backbone | Confers nuclease resistance by substituting sulfur for oxygen in the phosphate backbone; retains PABP binding [24] [25]. | High resistance to CAF1 deadenylase; maintains translation efficiency [24]. | Can have drawbacks in synthetic contexts [24]. |
| 2'-O-Methyl (2'-OMe) | Poly(A) tail sugar moiety | Bulky 2' group provides steric hindrance against nucleases like CAF1 [24]. | Confers strong resistance to CAF1 [24]. | Abolishes PABP binding activity [24]. |
| 2'-O-Methoxyethyl (2'-MOE) | Poly(A) tail sugar moiety | Even bulkier structure than 2'-OMe for enhanced nuclease resistance [24]. | Enhanced resistance to CAF1 and other nucleases [24]. | Abolishes PABP binding activity [24]. |
| 2'-Fluoro (2'-F) | Poly(A) tail sugar moiety | Alters the sugar conformation, increasing resistance to nucleases [25]. | Increases nuclease stability [25]. | Limited efficacy against high CAF1 concentration; abolishes PABP binding [24]. |
| Combined 2'-F/OMe/MOE | Poly(A) tail sugar moiety | Combinatorial approach yields enhanced resistance to multiple nucleases [24]. | High, broad-spectrum nuclease resistance [24]. | Requires an unmodified poly(A) "landing pad" (e.g., 12-nt) to recruit PABP [24]. |
| Cap Analogs (e.g., CleanCap) | 5' Cap | Used during in vitro transcription to produce synthetic mRNAs with a proper, native 5' cap structure [26]. | Ensures proper translation initiation; critical for therapeutic mRNA efficacy [26]. | Capping efficiency is a critical quality attribute that must be monitored [26]. |
A critical finding is that while modifications like 2'-OMe and 2'-MOE provide excellent nuclease resistance, they can abolish the mRNA's ability to bind PABP, which is essential for translation [24]. A strategic solution is to use a 12-nucleotide unmodified poly(A) sequence upstream of a fully modified poly(A) tail. This design confers both high nuclease resistance and PABP-binding activity, leading to significantly prolonged protein expression in vivo [24].
The following diagram illustrates how strategic modifications protect against the major pathways of mRNA degradation.
Troubleshooting FAQs and Experimental Protocols
FAQ 1: Despite a normal agarose gel, my mRNA shows poor translation efficiency. What could be wrong?
This is a classic sign of inefficient capping or poor poly(A) tail quality. Intact RNA on a gel only confirms the integrity of the phosphodiester backbone, not the status of its ends.
- Root Cause: In vitro transcribed (IVT) mRNA can have incomplete 5' capping or shortened/heterogeneous poly(A) tails. These defects do not affect migration on a standard gel but prevent the closed-loop formation necessary for efficient translation [23] [26].
- Solutions:
- Analyze Capping Efficiency: Use Reverse Transcription-Polymerase Chain Reaction (RT-PCR) - Sanger Sequencing or Liquid Chromatography-tandem Mass Spectrometry (LC-MS/MS) to confirm the sequence and presence of modifications. Alternatively, HPLC coupled with UV or MS detection can directly quantify capping efficiency [26].
- Check Poly(A) Tail Length: Employ capillary gel electrophoresis (CGE) to accurately determine the length and distribution of the poly(A) tail. This technique provides high resolution compared to agarose gels and can reveal tail shortening or heterogeneity [26].
- Verify Functionality: Perform an in vitro translation assay followed by Western blotting to confirm the production of the target protein. This directly tests the functional outcome of your mRNA construct [26].
FAQ 2: I've modified the poly(A) tail for stability, but protein expression has dropped. Why?
You have likely impaired the binding of the Poly(A)-Binding Protein (PABP). While chemical modifications increase nuclease resistance, some can prevent PABP from recognizing and binding to the tail.
- Root Cause: Modifications such as 2'-F, 2'-OMe, and 2'-MOE, especially at high modification rates, can abolish PABP-binding activity. Without PABP, the closed-loop complex cannot form, and translation initiation is severely compromised [24].
- Solutions:
- Use a PABP-Compatible Modification: Phosphorothioate (PS) modification has been shown to confer nuclease resistance while retaining PABP binding [24].
- Employ a Hybrid Tail Design: Incorporate a short (e.g., 12-nucleotide) unmodified poly(A) sequence immediately upstream of the chemically modified poly(A) tail. This "landing pad" recruits PABP, while the downstream modified section provides nuclease resistance. This design has been proven to prolong protein expression in cells and live animals [24].
- Validate Binding: Use Surface Plasmon Resonance (SPR) to experimentally test the binding affinity of your modified RNA constructs for PABP, comparing them to an unmodified control [24].
FAQ 3: My mRNA degrades rapidly in cell culture or serum. How can I make it more stable?
This indicates insufficient protection against ubiquitous nucleases. A multi-pronged approach targeting both ends of the mRNA is required.
- Root Cause: Native RNA is highly sensitive to degradation by nucleases in biological fluids (RNases) and within cells by the core decay machinery (e.g., deadenylases, exonucleases) [25] [1].
- Solutions:
- Implement Combinatorial Modifications: Relying on a single type of modification may be insufficient. Studies show that combining 2'-F, 2'-OMe, and 2'-MOE modifications within the poly(A) tail results in enhanced resistance to a broader spectrum of nucleases, including deadenylases like CAF1 [24].
- Stabilize Both Ends: Ensure a high-quality, stable 5' cap (e.g., using CleanCap technology) in addition to a modified poly(A) tail. The synergy between both terminal structures is crucial for maximum stability.
- Consider Nucleoside Modifications: Incorporate modified nucleosides like pseudouridine (Ψ) or 5-methylcytidine (5mC) throughout the coding sequence. These modifications decrease the immunogenicity of the mRNA and can further enhance its overall stability by making it less recognizable to innate immune sensors [26].
The Scientist's Toolkit: Essential Reagents and Assays
Table 2: Key Research Reagents and Analytical Tools for mRNA Stability Research
| Reagent / Tool | Function / Application | Key Feature / Rationale |
|---|---|---|
| CleanCap Analog | Co-transcriptional capping for IVT mRNA. | Produces a natural 5' cap structure (Cap 1), leading to higher translation efficiency and lower immunogenicity than older cap analogs [26]. |
| Modified Nucleotides (Ψ, 5mC, 2'-OMe, PS) | Substitutes for standard NTPs during IVT. | Enhances mRNA stability and reduces immune activation. The choice of modification (base vs. backbone) depends on the target (e.g., overall stability vs. poly(A) tail protection) [24] [25] [26]. |
| Poly(A) Polymerase | Adding a defined poly(A) tail to IVT mRNA. | Allows for the precise addition of a homogenous poly(A) tail of a specific length, a critical factor for mRNA stability and expression [26]. |
| Recombinant CAF1 / CCR4-NOT | In vitro deadenylation assay. | Used to directly test and quantify the resistance of modified poly(A) tails to the main cellular deadenylation machinery [24] [1]. |
| Recombinant PABP | In vitro binding assays (e.g., SPR, EMSA). | Essential for validating that stabilizing modifications to the poly(A) tail do not disrupt its crucial interaction with PABP [24]. |
| Capillary Gel Electrophoresis (CGE) | Analyze mRNA integrity/purity and poly(A) tail length distribution. | Provides high-resolution analysis of mRNA size and integrity, superior to agarose gels, for detecting truncated fragments and tail heterogeneity [26]. |
| LC-MS/MS | Comprehensive characterization of mRNA sequence, identity, and modifications. | Confirms sequence, identifies incorporation of modified nucleotides, and assesses capping efficiency with high accuracy [26]. |
Core Experimental Protocol: Assessing Poly(A) Tail Stability Against Deadenylation
This protocol is adapted from Hashimoto et al. (2025) to evaluate how chemical modifications to the poly(A) tail confer resistance to deadenylation, a key step in mRNA decay [24].
Objective: To measure the in vitro resistance of chemically modified poly(A) tails to degradation by the CAF1 deadenylase enzyme.
Materials:
- RNA Substrate: 5'-fluorescently labeled (e.g., ATTO488) RNA oligonucleotide. The substrate consists of a 13-nt unmodified non-poly(A) sequence, followed by a 20-nt poly(A) sequence with the desired chemical modification pattern [24].
- Enzyme: Recombinant human CAF1 protein (a catalytic subunit of the CCR4-NOT complex) [24].
- Reaction Buffer: Typically composed of Tris-HCl (pH ~7.5), KCl, MgCl₂, and DTT.
- Equipment: Thermostatic incubator, denaturing polyacrylamide gel electrophoresis (PAGE) apparatus, and a fluorescence gel imaging system.
Procedure:
- Reaction Setup: Prepare a reaction mixture containing the reaction buffer and a defined concentration (e.g., 2.5 µM) of recombinant CAF1 enzyme [24].
- Initiation: Start the reaction by adding the fluorescently labeled RNA substrate to the mixture.
- Incubation: Incubate the reaction at 37°C. Remove aliquots at specific time points (e.g., 0, 5, 15, 30, 60 minutes) and immediately quench them with a stop solution (e.g., EDTA or formamide) to inactivate the enzyme.
- Analysis:
- Resolve the time-point aliquots on a denaturing polyacrylamide gel.
- Use fluorescence imaging to visualize the remaining full-length RNA substrate.
- Quantify the band intensity to plot the degradation kinetics over time. The half-life of the modified RNA can be calculated and compared to an unmodified control.
Expected Outcome: RNA with stabilizing modifications (e.g., PS, 2'-OMe, 2'-MOE) will show significantly slower degradation kinetics and a higher percentage of full-length RNA remaining compared to the unmodified control, demonstrating enhanced resistance to CAF1-mediated deadenylation [24]. The following flowchart summarizes this experimental workflow.
Troubleshooting Guides
Troubleshooting Guide: Sample Handling and RNA Degradation
| Problem | Potential Cause | Recommended Solution | Supporting Data / Rationale |
|---|---|---|---|
| Low RNA Yield/Quality from stored tissues | RNase activity after cell death; suboptimal thawing of frozen samples [27] [3] | Homogenize in chaotropic lysis buffer (e.g., GITC) or flash-freeze in liquid nitrogen immediately upon collection. For frozen tissues, thaw on ice (for ≤100 mg) or at -20°C (for larger aliquots) in RNALater [27] [3]. | Guanidinium thiocyanate (GITC) inactivates RNases [28]. Ice-thawing of small samples minimizes thawing rate and RNase exposure [27]. |
| RNA degradation during storage or transport | Lack of cold chain; storage in non-inactivating buffers [28] | Use a known inactivant like MagMAX Lysis/Binding Solution for room temperature storage [28]. | MagMAX lysis buffer enables room temp (21°C) storage for up to 12 weeks and 32°C for up to 4 weeks with Ct value change <6.6 [28]. |
| Inconsistent RNA Integrity Number (RIN) | Multiple freeze-thaw cycles; large tissue aliquot sizes [27] | Aliquot RNA to avoid freeze-thaw cycles [3]. For tissues, create small aliquots (≤30 mg) before freezing [27]. | Larger tissue aliquots (250-300 mg) showed significantly lower RIN (5.25) after freeze-thaw vs. smaller aliquots [27]. |
| Protein or organic solvent contamination in RNA sample | Incomplete purification during isolation [29] [30] | Check RNA purity with A260/A280 and A260/A230 ratios. Use DNase treatment (e.g., on-column digestion) to remove genomic DNA [3]. | Pure RNA has A260/A280 ~2.0 and A260/A230 >1.8 [30]. The PureLink DNase Set facilitates efficient DNA removal [3]. |
| Poor downstream RT-qPCR results | Degraded RNA or presence of inhibitors [29] | Assess RNA integrity (e.g., RIN) prior to use. For qPCR, use samples with RIN ≥7; it can tolerate RIN as low as 2 [3]. | RT-qPCR targets short amplicons (75-150 bp) and is more tolerant of partial degradation [28] [29]. |
Quantitative Impact of Temperature and Time on RNA Stability
Table: Change in RT-qPCR Ct Values for Tissue RNA Stored in MagMAX Lysis Buffer at Different Temperatures [28]
| Storage Duration | -80°C | 4°C | 21°C (Room Temp) | 32°C (Elevated Temp) |
|---|---|---|---|---|
| 4 Weeks | Minimal change (<3.3 Ct) | Minimal change (<3.3 Ct) | No significant change (<6.6 Ct) | No significant change (<6.6 Ct) |
| 8 Weeks | Minimal change (<3.3 Ct) | Minimal change (<3.3 Ct) | No significant change (<6.6 Ct) | ~100-1000 fold loss (6.6-9.9 Ct increase) |
| 12 Weeks | Minimal change (<3.3 Ct) | Minimal change (<3.3 Ct) | No significant change (<6.6 Ct) | Degradation continues |
| 36 Weeks | Minimal change (<3.3 Ct) | Minimal change (<3.3 Ct) | ~100-1000 fold loss (6.6-9.9 Ct increase) | Mostly degraded |
| 52 Weeks | Minimal change (<3.3 Ct) | Minimal change (<3.3 Ct) | Degradation continues (Some tissues unquantifiable) | Mostly degraded (Only some tissues quantifiable) |
Experimental Protocol (Referenced Data): Guinea pig tissues were homogenized in MagMAX Lysis/Binding Solution Concentrate and stored at the temperatures listed. RNA was extracted at defined time points over 52 weeks using the MagMAX Pathogen RNA/DNA Kit on a KingFisher Apex system. RNA was eluted in 75 µL buffer and stored at -80°C. RT-qPCR was performed targeting the Ppia gene, and changes in Ct values were calculated relative to the week 0 baseline [28].
Frequently Asked Questions (FAQs)
What are the most critical steps to prevent RNA degradation immediately after sample collection? The most critical steps are immediate RNase inactivation. You can achieve this by either: 1) Homogenizing the sample in a strong chaotropic lysis buffer like TRIzol or buffers containing guanidinium thiocyanate (GITC); 2) Flash-freezing in liquid nitrogen (ensure tissue pieces are small); or 3) Placing the sample in RNALater solution. The key is to inactivate endogenous RNases that are released upon cell death [3].
My samples need to be shipped without cold packs. Is this possible? Yes, but it requires planning. Collect samples directly into a validated inactivation and stabilization buffer, such as MagMAX Lysis/Binding Solution. Research shows that RNA in such buffers can remain stable for up to 12 weeks at room temperature (21°C) and up to 4 weeks at 32°C without significant degradation, making transport feasible [28].
How do I choose the best method to check the quality and quantity of my RNA? The choice depends on your downstream application and available equipment.
- Spectrophotometry (e.g., NanoDrop): Best for quick concentration and purity checks (A260/A280 ~2.0; A260/A230 >1.8). It does not assess integrity and can be skewed by contaminants [29] [30].
- Fluorometry (e.g., Qubit): More accurate for concentration, especially for low-concentration samples, but does not provide integrity information [29] [3].
- Capillary Electrophoresis (e.g., Bioanalyzer): The gold standard for assessing RNA integrity (RIN). It provides a RIN score from 1 (degraded) to 10 (intact). A RIN ≥7 is recommended for sequencing, while qPCR can tolerate lower values [30] [3].
Why does my RNA look fine after isolation but my downstream assays fail? The issue could be residual contaminants or DNA. Check your A260/A230 ratio for salt or solvent contamination. Also, if your downstream assay (e.g., qPCR with non-intron-spanning primers) is sensitive to DNA, perform an on-column DNase digestion during purification. Always include a no-reverse-transcriptase (-RT) control in your qPCR experiments to check for genomic DNA amplification [3].
What is the best way to store purified RNA for the long term? Purified RNA should be stored at -80°C in single-use aliquots. Using single aliquots prevents repetitive freeze-thaw cycles, which can degrade RNA. Avoid storing RNA in water for long periods; instead, use specialized RNase-free buffers or TE buffer [3].
The Scientist's Toolkit: Key Reagent Solutions
Table: Essential Reagents for Protecting RNA Integrity During Sample Preparation
| Reagent / Kit | Primary Function | Key Features & Applications |
|---|---|---|
| MagMAX Lysis/Binding Solution [28] | Sample inactivation & RNA stabilization | Contains guanidinium thiocyanate (GITC); inactivates viruses and RNases; enables ambient temperature storage. |
| RNALater [27] [3] | RNA stabilization for fresh tissues | Aqueous, non-toxic reagent; penetrates tissues to stabilize RNA without immediate freezing; ideal for field collections. |
| TRIzol Reagent [27] [3] | RNA isolation & stabilization | Phenol and guanidine isothiocyanate-based; effective for difficult samples (high in fat, nucleases); inactivates RNases during homogenization. |
| PureLink RNA Mini Kit [3] | Total RNA purification | Silica column-based method; includes optional on-column DNase digestion; efficient for most standard sample types. |
| PureLink DNase Set [3] | DNA removal | For on-column or post-purification DNA digestion; critical for applications sensitive to DNA contamination (e.g., qPCR). |
Experimental Workflow and Degradation Pathways
The following diagram illustrates the core experimental workflow for protecting RNA integrity and the primary pathways of degradation that occur when safeguards fail.
Robust RNA Handling: Proven Techniques for Stabilization and Isolation
Ribonucleases (RNases) are ubiquitous, resilient enzymes that pose a significant threat to RNA integrity in laboratory settings. Their relentless activity can degrade RNA molecules, compromising experimental results and undermining research on gene expression, drug development, and diagnostic assays. Establishing an RNase-free environment is not merely a recommendation but a fundamental requirement for successful RNA research. This guide provides a comprehensive framework for building your "RNase-free fortress," integrating sterile techniques, strategic DEPC treatment, and appropriate lab consumables to safeguard your valuable RNA samples throughout the preparation process.
The Scientist's Toolkit: Essential Reagents and Materials
Table 1: Key Research Reagent Solutions for an RNase-Free Laboratory
| Item | Function & Importance |
|---|---|
| DEPC (Diethylpyrocarbonate) | Inactivates RNases by covalent modification of histidine residues in their active sites. Essential for treating aqueous solutions [31] [32]. |
| RNase Inhibitors (e.g., Protector, Human Placental) | Protein-based reagents that non-covalently bind to and inhibit a broad spectrum of RNases (e.g., RNase A, B, C). Crucial for protecting RNA during enzymatic reactions [33] [34]. |
| Beta-Mercaptoethanol (BME) | Added to lysis buffers to denature proteins and inactivate RNases, thereby stabilizing RNA samples during extraction [35]. |
| RNase Decontamination Solutions | Ready-to-use sprays or solutions for decontaminating surfaces, glassware, and equipment like pipettors. They work immediately upon contact [31]. |
| RNase-Free Water | The cornerstone of all RNA-related solutions. Typically prepared by DEPC-treatment and autoclaving, or purchased as certified nuclease-free [31] [36]. |
| Guanidine Salts | Powerful chaotropic agents in lysis buffers that denature proteins and inactivate RNases during sample homogenization [35] [37]. |
| DNase I (RNase-Free) | For the removal of contaminating genomic DNA from RNA preparations, which is critical for downstream applications like PCR [35] [38]. |
| RNA Stabilization Reagents (e.g., RNALater) | Used to permeate and stabilize tissues and cells immediately after collection, preserving RNA integrity during sample storage [31] [35]. |
Foundational Defenses: Sterile Technique and Workspace Management
The first layer of your fortress involves rigorous sterile technique and a dedicated workspace to minimize the introduction of RNases.
Personal Protective Equipment (PPE) and Conduct
- Gloves: Always wear clean gloves and change them frequently, especially after touching common surfaces like refrigerator doors, centrifuge lids, or doorknobs [31] [33]. Treat gloved hands as potentially contaminated.
- Lab Coats: Use a dedicated, clean lab coat for RNA work to prevent contamination from clothing or other lab activities [31].
Dedicated Workspace and Surface Decontamination
- Designate a specific, clean area for RNA work only [33] [34].
- Before starting, wipe down the bench and equipment with a commercial RNase decontamination solution or 0.1% SDS followed by 100% ethanol [31] [33].
RNase-Free Lab Consumables
- Use certified RNase-free disposable plasticware (pipette tips, microcentrifuge tubes) whenever possible [31] [36].
- For reusable glassware, bake at 180-300°C for at least 4 hours [31] [33]. Plasticware can be treated by soaking in 0.1 M NaOH/1 mM EDTA, followed by rinsing with DEPC-treated water [33].
- Critical Note: Autoclaving alone is not sufficient to inactivate many resilient RNases [33] [32].
Strategic Weaponry: DEPC Treatment and Solution Management
DEPC is a potent chemical weapon against RNases in solutions, but it must be used correctly.
DEPC Treatment Protocol for Solutions
- Addition: Add DEPC to the solution at a concentration of 0.05–0.1% (v/v) (e.g., 0.5–1 mL per liter of solution) [31].
- Incubation: Stir or shake the solution vigorously and allow it to incubate for several hours to overnight at room temperature [31] [34].
- Inactivation: Autoclave the solution for at least 45-60 minutes to hydrolyze and remove all unreacted DEPC [31] [32]. A faint, sweet (ester-like) smell after autoclaving is normal and does not indicate active DEPC [32].
Critical Limitations and Considerations
- DO NOT treat Tris buffers with DEPC. Tris contains primary amines that react with and inactivate DEPC, making the treatment ineffective [31] [32]. Prepare Tris buffers using DEPC-treated, autoclaved water and RNase-free glassware.
- DEPC is a suspected carcinogen. Always handle it with gloves and under a certified fume hood [31].
- Residual DEPC can inhibit enzymes. For critical enzymatic reactions, consider using high-purity, RNase-free water that has been filtered but not DEPC-treated [32] [34].
Table 2: DEPC Treatment Efficacy and Guidelines
| Factor | Consideration & Experimental Evidence |
|---|---|
| Concentration Efficacy | 0.1% DEPC inactivates RNase A up to ~500 ng/ml. Higher contamination (1 µg/ml) requires 1% DEPC [32]. |
| Inhibition of Reactions | Transcription reactions show reduced % incorporation with increasing DEPC carryover (64% with 0.01% vs. 53% with 1% DEPC in reaction) [32]. |
| Compatibility | Effective for PBS and MOPS. Not compatible with Tris, HEPES, or other amine-containing buffers [32]. |
| Alternative | High-quality purified water (e.g., Milli-Q) can be sufficiently RNase-free for many applications [34]. |
Troubleshooting Guide: Common RNA Isolation Problems and Solutions
Even with precautions, problems can arise. This guide helps diagnose and correct common issues.
Table 3: Troubleshooting Common RNA Isolation Problems
| Problem | Potential Causes | Verified Solutions |
|---|---|---|
| Degraded RNA | • Sample improperly stored/thawed.• RNase contamination during extraction.• Incomplete tissue homogenization. | • Flash-freeze samples in LN₂/-80°C or use RNALater [35].• Add BME (10 µl/ml) to lysis buffer [35].• Homogenize completely in bursts to avoid heating [35] [37]. |
| Low Yield | • Incomplete homogenization/lysis.• RNA pellet not fully dissolved.• Column overloaded or incomplete elution. | • Increase homogenization time; ensure no tissue debris remains [38] [37].• Incubate pellet on ice in RNase-free water for 15 min [33].• For columns, incubate elution buffer for 5-10 min before spinning [38]. |
| Genomic DNA Contamination | • DNA not efficiently sheared or removed. | • Use on-column or in-solution DNase I treatment [35] [38].• Ensure homogenization method sufficiently shears DNA [35]. |
| Poor Purity (Low A260/280 or A260/230) | • Low A260/280: Protein contamination.• Low A260/230: Guanidine salt or organic carryover. | • Clean up sample with another purification round; ensure Proteinase K step is complete [38] [37].• Perform extra wash steps with 70-80% ethanol [35] [38]. |
| Clogged Column | • Insufficient sample disruption.• Too much starting material. | • Centrifuge homogenate to pellet debris; use supernatant [38] [37].• Reduce amount of starting material to kit specifications [38]. |
Frequently Asked Questions (FAQs)
Q1: Is autoclaving sufficient to make my solutions RNase-free? A: No. While autoclaving alone can inactivate a substantial amount of RNase A, it is not reliable for all RNases and should not be relied upon as the sole method. DEPC treatment or the use of certified RNase-free solutions is recommended for critical work [32].
Q2: How should I store purified RNA for long-term stability? A: For long-term storage, RNA is most stable at -70°C to -80°C [31] [33]. It can be stored as an ethanol precipitate or in RNase-free water/TE buffer (with 0.1 mM EDTA to chelate metal ions). When stored in aqueous solution at -80°C, RNA is generally stable for up to a year without degradation [31] [36].
Q3: My RNA is not degrading, but my downstream applications (like RT-PCR) are failing. What could be the issue? A: Inhibitors carried over from the isolation process are a common culprit. A low A260/230 ratio indicates salt or organic inhibitor carryover. Perform additional wash steps or an ethanol precipitation to desalt the sample. Also, ensure that all traces of ethanol from wash steps are removed, as this can inhibit enzymes [35] [38] [37].
Q4: Can I use UV light to decontaminate my plasticware and surfaces from RNases? A: The search results do not support UV light as a reliable method for eliminating RNases. The recommended approaches are baking glassware, chemical decontamination with RNase-inactivating agents or hydrogen peroxide for plastic surfaces, and the use of certified disposable plasticware [31] [33] [34].
Creating a robust RNase-free fortress is a multi-faceted endeavor that demands diligence at every step. By integrating consistent sterile techniques, applying DEPC treatment knowledgeably, utilizing RNase-free consumables, and having a clear troubleshooting roadmap, researchers can effectively shield their RNA samples from degradation. This comprehensive approach ensures the integrity of your RNA, thereby guaranteeing the reliability of your data and the success of your research in molecular biology and drug development.
FAQs: Lysis and Homogenization for RNA Integrity
1. What is the most important factor in choosing a homogenization method to prevent RNA degradation?
The choice depends heavily on your tissue type and the need to inactivate endogenous RNases immediately upon cell disruption. For tough, fibrous tissues (e.g., skin, tumors), a mechanical homogenizer often provides more consistent and complete disruption, leading to higher RNA yield and quality [39]. For sensitive tissues with high intrinsic RNase activity (e.g., pancreas), a combination of manual and mechanical lysis in a strong chaotropic lysis buffer is critical to instantly denature RNases [40].
2. What are the key differences between mechanical and chemical lysis for cellular disruption?
- Mechanical Lysis: Uses physical force (e.g., blades, beads, shear force) to break open cells. It is highly effective for tough tissues and does not introduce chemical contaminants. However, it can generate heat and shear stress that may damage labile macromolecules if not controlled [39] [41].
- Chemical Lysis: Uses reagents (e.g., detergents, enzymes) to dissolve cell membranes. It is generally gentler and easier to scale but requires careful selection of detergents to avoid damaging the target (e.g., viral capsids in gene therapy) and introduces a reagent that may need to be removed later [42] [43].
3. My RNA yields are low from a difficult tissue (high in RNase or fat). How can I improve this?
For challenging tissues like pancreas, brain, or adipose tissue, a phenol-guanidine isothiocyanate-based method (e.g., TRIzol) is often required [3] [41]. Ensure you:
- Section the tissue into small pieces (<100 mg) before storage or processing.
- Use RNAlater or flash-freeze in liquid nitrogen immediately after collection to stabilize RNA.
- Employ a rigorous mechanical homogenization method directly in the lysis solution to achieve complete and rapid disruption [40].
4. How does the homogenization method impact downstream applications like RNA sequencing?
The RNA Integrity Number (RIN) is a critical metric. High-quality RNA (RIN ≥ 7) is typically required for reliable sequencing and gene expression data. Studies show that the homogenization method directly influences RIN; using a tissue homogenizer was found to produce RNA with the highest median RIN values across various tissues compared to mortar/pestle or ball mill methods [39]. Low RIN values can lead to biased or failed downstream analyses.
5. What are common points of failure in a homogenization workflow that lead to RNA degradation?
Common failure points include:
- Delayed Stabilization: Not immersing tissue in RNAlater or liquid nitrogen quickly enough after collection.
- Incomplete Homogenization: Leaving tissue fragments that release RNases during subsequent steps.
- Heat Generation: Overheating the sample during prolonged mechanical grinding.
- Incorrect Lysis Buffer: Using a mild lysis buffer for a tough or nuclease-rich tissue [3] [40].
Troubleshooting Guides
Guide 1: Poor RNA Yield or Quality
| Symptom | Possible Cause | Solution |
|---|---|---|
| Low RNA concentration | Incomplete tissue disruption. | Optimize homogenization time/speed; pre-treat fibrous tissues with collagenase [39]. |
| Overloading the purification column. | Do not exceed the recommended maximum tissue input for your kit [3]. | |
| Low A260/A280 ratio (<1.8) | Protein contamination. | Add a purification column step; ensure proper phase separation in phenol-chloroform extraction [3]. |
| Low A260/230 ratio | Contamination by salts or organics. | Wash RNA pellets thoroughly with ethanol; use recommended wash buffers [39]. |
| Low RIN Value | Slow RNase inactivation; sample overheating. | Homogenize directly into a chaotropic lysis buffer; keep samples cold using cryogenic grinding [39] [40]. |
Guide 2: Homogenizer Equipment Failure
| Symptom | Possible Cause | Solution |
|---|---|---|
| Machine won't start | Blown fuse; tripped circuit breaker; motor overload. | Check and replace fuses; reset breakers; ensure ventilation is clear and reduce motor load [44]. |
| Excessive noise/vibration | Worn bearings; loose components; misalignment. | Inspect and replace worn bearings; tighten all loose bolts and components [45] [44]. |
| Low flow rate | Product too viscous; air in the system; worn seals. | Pre-dilute viscous samples; bleed air from lines; inspect and replace worn seals/gaskets [44] [46]. |
| Poor homogenization quality | Incorrect pressure/speed settings; worn parts. | Verify and adjust operating pressure and speed; inspect and replace worn valves or seals [45] [44]. |
The following table summarizes key experimental data from a 2025 study comparing three homogenization methods across different human tissues, highlighting their impact on RNA quality and concentration [39].
Table: Comparison of Homogenization Methods on RNA from Human Tissues
| Tissue Type | Homogenization Method | RNA Concentration (ng/µl) | RNA Purity (260/280) | RNA Purity (260/230) | RNA Integrity Number (RIN) |
|---|---|---|---|---|---|
| HNC Tumor | Mortar & Pestle | 139.92 ± 91.45 | 2.19 ± 0.12 | 0.74 ± 0.45 | 6.00 ± 2.86 |
| Ball Mill | 309.68 ± 178.33 | 2.05 ± 0.02 | 1.25 ± 0.71 | 4.38 ± 2.06 | |
| Tissue Homogenizer | 685.73 ± 420.83 | 2.11 ± 0.04 | 1.63 ± 0.29 | 5.37 ± 0.65 | |
| HNC Normal | Mortar & Pestle | 120.80 ± 201.87 | 2.13 ± 0.09 | 0.34 ± 0.42 | 6.83 ± 3.12 |
| Ball Mill | 58.41 ± 40.32 | 2.06 ± 0.04 | 1.17 ± 0.58 | 3.88 ± 2.03 | |
| Tissue Homogenizer | 100.85 ± 47.83 | 2.06 ± 0.06 | 1.15 ± 0.92 | 5.23 ± 1.53 | |
| Breast Skin | Mortar & Pestle | 15.97 ± 9.67 | 2.65 ± 0.83 | 0.14 ± 0.09 | 2.60 ± 2.10 |
| Ball Mill | 10.64 ± 11.74 | 2.21 ± 0.27 | 0.10 ± 0.07 | 1.80 ± 1.90 | |
| Tissue Homogenizer | 108.58 ± 135.99 | 2.23 ± 0.28 | 0.68 ± 0.70 | -* |
Data presented as mean ± SD. *Value not reported in the source study. HNC: Head and Neck Cancer. The tissue homogenizer consistently showed advantages in RNA concentration and purity ratios [39].
Experimental Protocol: Integrated RNA, DNA, and Protein Extraction from Tissues
This protocol, adapted from a 2025 study, uses a mechanical homogenizer with TRIzol for simultaneous macromolecule extraction from a single tissue sample, ensuring correlated data from limited specimens [41].
Workflow Diagram:
Materials & Reagents:
- TRIzol Reagent: A monophasic solution of phenol and guanidine isothiocyanate for effective lysis and nuclease inhibition [41] [40].
- Mechanical Tissue Homogenizer: e.g., ULTRA-TURRAX T10 basic, for complete tissue disruption [39] [41].
- Chloroform
- RNase-free tubes, tips, and benchtop cover
- Isopropanol and Ethanol (75%)
- RNase-free Water
Step-by-Step Method:
- Tissue Preparation: Place a piece of snap-frozen tissue (recommended <100 mg) into a tube containing 600 µl - 1 ml of TRIzol Reagent [41] [40].
- Mechanical Homogenization: Immediately homogenize the tissue using the mechanical homogenizer at high speed until the tissue is completely disrupted (typically 1-3 minutes). Keep samples on ice to mitigate heat generation.
- Phase Separation: Incubate the homogenate at room temperature for 5 minutes. Add 0.2 volumes of chloroform, shake vigorously for 15 seconds, and incubate for 2-3 minutes. Centrifuge at 12,000 × g for 15 minutes at 4°C. The mixture will separate into three phases: a colorless upper aqueous phase (RNA), a white interphase (DNA), and a red lower organic phase (proteins) [41].
- RNA Recovery: Transfer the aqueous phase to a new tube. Precipitate the RNA by mixing with isopropanol, incubating, and centrifuging. Wash the pellet with 75% ethanol and dissolve the final RNA pellet in RNase-free water.
- DNA and Protein Recovery: Follow established protocols for DNA precipitation from the interphase and protein precipitation from the organic phase [41].
- Quality Control: Assess RNA concentration and purity using a spectrophotometer (A260/A280 ratio of ~2.0 is ideal) and determine the RNA Integrity Number (RIN) using a Bioanalyzer [39] [3].
The Scientist's Toolkit: Essential Reagents & Materials
Table: Key Research Reagent Solutions for Lysis and Homogenization
| Reagent/Material | Function & Application |
|---|---|
| TRIzol (Phenol-Guanidine Isothiocyanate) | A potent lysis reagent that simultaneously denatures proteins and RNases, enabling the co-extraction of RNA, DNA, and proteins from a single sample. Ideal for difficult tissues [41] [40]. |
| RNAlater Stabilization Solution | An aqueous, non-toxic solution used to rapidly permeate and stabilize tissue samples immediately after collection, preventing RNA degradation prior to homogenization [3] [40]. |
| Non-ionic Detergents (e.g., Triton X-100) | Chemical lysis agents that disrupt lipid membranes to release intracellular contents, such as viral vectors. Being phased out due to environmental regulations (REACH) [42]. |
| Chaotropic Lysis Buffers (e.g., with Guanidine) | Found in many RNA isolation kits, these buffers denature RNases and proteins, protecting RNA integrity during and after homogenization [3]. |
| RNaseZap Decontamination Solution | Used to decontaminate surfaces, pipettors, and glassware to eliminate ambient RNases that could degrade purified RNA samples [3]. |
| PureLink DNase Set | Allows for convenient on-column digestion of contaminating genomic DNA during RNA isolation, which is critical for applications like qRT-PCR [3]. |
The isolation of high-quality, intact RNA is a foundational step in molecular research and drug development. However, RNA is notoriously vulnerable to degradation by ubiquitous ribonucleases (RNases), a challenge that is often exacerbated during sample preparation [3]. The choice of purification method is therefore critical, as it must rapidly inactivate these enzymes to preserve an accurate transcriptomic snapshot. This technical support center focuses on the two predominant techniques for RNA purification: silica spin columns and organic extraction (exemplified by TRIzol reagent). By providing a detailed comparison, troubleshooting guides, and optimized protocols, this resource is designed to help researchers select and execute the optimal strategy to combat RNA degradation in their specific experimental context.
Method Comparison: Silica Spin Columns vs. TRIzol
The following table provides a direct comparison of the key characteristics between silica spin columns and TRIzol organic extraction to guide your method selection [47] [48].
Table 1: A direct comparison of Silica Spin Columns and TRIzol organic extraction.
| Parameter | Silica Spin Columns | TRIzol (Organic Extraction) |
|---|---|---|
| Basic Principle | Nucleic acid binding to a silica membrane in the presence of chaotropic salts [47]. | Liquid-phase separation of RNA, DNA, and protein using an acid-guanidinium-phenol solution [47]. |
| Typical Yield | Generally high, but some loss can occur, particularly for short RNAs [47]. | Very high yield when performed correctly; efficient for both long and short nucleic acids [47] [48]. |
| Typical Purity (A260/280) | Typically high purity (ratios of ~1.8-2.0) [48]. | Can have protein/DNA contamination; purity can be lower [48]. |
| Speed | Fast; can be completed in 15-30 minutes [47]. | Slower due to phase separation and required precipitation steps [47]. |
| Cost | Higher cost per sample [47]. | Very low cost per sample [47]. |
| Ease of Use | Simple, user-friendly protocol with minimal hands-on time [47]. | Technically demanding, requires careful pipetting and handling of toxic reagents [47]. |
| Safety | Safe; does not involve highly toxic chemicals [47]. | Hazardous; involves phenol and chloroform, requiring specialized disposal [47]. |
| Throughput & Automation | Suitable for 96-well plates and limited automation [47]. | Difficult to automate due to complex liquid handling [47]. |
| Best For | Routine, high-purity RNA extraction from standard samples; clinical diagnostics; situations requiring safety and simplicity [47] [3]. | Difficult samples (high in lipids, nucleases, or carbohydrates); when maximizing yield of all RNA types is critical; cost-sensitive projects [47] [3]. |
Essential Research Reagent Solutions
The following table lists key reagents and their functions essential for successful RNA isolation, regardless of the chosen method.
Table 2: Essential reagents and materials for RNA isolation protocols.
| Reagent/Material | Function | Key Considerations |
|---|---|---|
| Chaotropic Salts (e.g., Guanidinium Isothiocyanate) | Denature proteins and RNases; facilitate binding of RNA to silica [47] [3]. | A core component of both TRIzol and silica column lysis buffers. |
| Phenol (in TRIzol) | A strong protein denaturant that facilitates separation of RNA from DNA and protein [47] [49]. | Highly toxic. The acidic pH in TRIzol ensures RNA partitions to the aqueous phase. |
| Silica Membrane/Beads | Solid phase to which nucleic acids bind in the presence of chaotropic salts and alcohol [47]. | The physical basis of spin columns and magnetic bead methods. |
| RNase Decontamination Solutions (e.g., RNaseZap) | Inactivate RNases on lab surfaces, equipment, and glassware [50] [3]. | Critical for preventing exogenous RNA degradation. |
| DNase I (RNase-free) | Enzymatically degrades residual genomic DNA contaminating the RNA preparation [51] [3]. | Often used in an "on-column" digestion step for silica kits. |
| RNAlater / RNA Stabilization Solution | Stabilizes and protects RNA in intact, unfrozen tissue and cell samples immediately after collection [52] [3]. | Allows for sample storage or transport without immediate freezing. |
| Glycogen or Linear Polyacrylamide | Acts as a co-precipitant to "carrier" low amounts of RNA during isopropanol/ethanol precipitation, improving pellet visibility and recovery [53] [49]. | Particularly useful for TRIzol extractions from low-input samples. |
Workflow and Decision Pathway
The diagram below illustrates the core procedural steps for the two main RNA isolation methods and a logical pathway for selecting the appropriate technique.
Troubleshooting Guide: Frequently Asked Questions
Low RNA Yield
Problem: The final RNA concentration is too low for downstream applications.
Silica Column-specific Causes & Solutions:
- Cause: Column Overloading or Clogging. Input material exceeds the kit's binding capacity or debris clogs the membrane [51] [50].
- Cause: Incomplete Elution. RNA remains bound to the silica membrane.
- Solution: After adding the elution buffer, incubate the column at room temperature for 5 minutes before centrifugation. Using pre-warmed (e.g., 55°C) elution buffer can also improve efficiency [50].
TRIzol-specific Causes & Solutions:
- Cause: Incomplete Homogenization or Lysis. Tissues or cells were not fully disrupted.
- Cause: Invisible RNA Pellet. The RNA quantity is too low to form a visible pellet after precipitation.
General Causes & Solutions:
- Cause: RNA Degradation. RNases were active during sample collection or processing.
Poor RNA Purity
Problem: Spectrophotometric readings (A260/280 and A260/230 ratios) are outside the ideal range (1.8-2.0 and 2.0-2.2, respectively).
Low A260/280 Ratio (Protein Contamination):
- Cause (TRIzol): Accidental carry-over of the interphase or organic phase during aqueous phase collection [49].
- Solution: Be extremely careful when pipetting the aqueous phase. Leave a small volume behind to avoid the interphase. If contaminated, re-extract the aqueous phase with a fresh volume of chloroform [49].
- Cause (General): Incomplete removal of proteins.
- Solution (Silica): Ensure all wash steps are performed as recommended. For TRIzol, ensure the initial homogenization in the reagent is complete and the 5-minute incubation post-homogenization is not skipped [53].
Low A260/230 Ratio (Salt or Solvent Carry-over):
DNA Contamination
Problem: Genomic DNA is detected in the purified RNA sample by PCR or other sensitive methods.
General Cause & Solution:
- Cause: Inefficient separation of DNA from RNA.
- Solution: Perform an on-column DNase I digestion step when using silica kits [51] [3]. For TRIzol preps, the DNA should partition to the interphase. If DNA contamination persists, consider adding an additional DNase I treatment (in-tube) after the RNA is purified [51] [48]. Ensure the pH of the TRIzol reagent is acidic (~4), as a basic pH will cause DNA to remain in the aqueous phase [47] [49].
RNA Degradation
Problem: RNA appears smeared on an agarose gel or has a low RNA Integrity Number (RIN).
General Causes & Solutions:
- Cause: Improper Sample Handling. Tissues were not stabilized immediately after collection, or homogenization generated excessive heat [50] [3].
- Cause: RNase Contamination During Purification.
Clogged Spin Columns
Problem: The liquid flow through the silica spin column is impeded or blocked.
Cause & Solution:
- Cause: The lysate contains too much cellular debris or the starting material was too dense/fibrous [51] [50].
Detailed Experimental Protocols
Detailed Protocol: RNA Isolation Using TRIzol Reagent
This protocol is adapted from manufacturer instructions and troubleshooting guides [53] [49].
- Homogenization: For cells, resuspend up to 10 million cells in 1 mL of TRIzol. For tissues, homogenize 10-100 mg of tissue in 1 mL of TRIzol using a powered homogenizer. Note: Perform homogenization in bursts of 30-45 seconds with 30 seconds of rest on ice to avoid overheating.
- Phase Separation: Incubate the homogenate for 5 minutes at room temperature (15-30°C) to completely dissociate nucleoprotein complexes. Add 0.2 mL of chloroform per 1 mL of TRIzol used. Cap the tube securely and vortex vigorously for 15-20 seconds until the mixture appears milky and homogeneous. Incubate at room temperature for 2-3 minutes. Centrifuge at 12,000 × g for 15 minutes at 4°C. Troubleshooting: If the aqueous phase is discolored (yellow, pink), it indicates contamination; recentrifuge or reduce starting material.
- RNA Precipitation: Transfer the colorless upper aqueous phase (containing the RNA) to a new tube. Avoid disturbing the interphase or lower organic phase. Add 0.5 mL of 100% isopropanol per 1 mL of TRIzol used. Mix by inverting the tube. Incubate at room temperature for 10 minutes. For low-yield samples, include 1-5 µL of glycogen as a carrier and precipitate at -20°C for 30-60 minutes. Centrifuge at 12,000 × g for 10 minutes at 4°C. The RNA forms a gel-like pellet, often invisible.
- RNA Wash: Carefully decant or pipette off the supernatant. Wash the pellet with 1 mL of 75% ethanol (prepared with nuclease-free water) per 1 mL of TRIzol used. Vortex the sample briefly and centrifuge at 7,500 × g for 5 minutes at 4°C. Carefully remove all ethanol.
- RNA Resuspension: Air-dry the pellet for 5-10 minutes at room temperature. Do not over-dry, as this will make the RNA difficult to resuspend. Redissolve the RNA in 20-50 µL of nuclease-free water or THE RNA Storage Solution by pipetting up and down and incubating at 55-60°C for 10-15 minutes if necessary. Store RNA at -80°C.
Detailed Protocol: RNA Isolation Using a Silica Spin Column
This protocol summarizes the general steps for most commercial kits, incorporating key troubleshooting tips [47] [51] [50].
- Lysis and Homogenization: Lyse and homogenize the sample in the kit's provided lysis buffer (which contains guanidinium salts). Note: For tissues, ensure complete homogenization. Centrifuge the lysate for 5 minutes at 12,000 × g to pellet debris and transfer the supernatant to a new tube.
- Binding: Add the specified volume of ethanol or isopropanol to the clarified lysate and mix thoroughly by pipetting. This step increases hydrophobicity and is essential for efficient RNA binding to the silica membrane. Apply the entire mixture to the spin column seated in a collection tube.
- Centrifuge and Wash: Centrifuge according to the kit's protocol to bind RNA to the membrane and discard the flow-through. Wash the column once or twice with the provided wash buffers. Troubleshooting: For the final wash, extend the centrifugation time by 1-2 minutes to ensure complete ethanol removal.
- DNase Treatment (Optional but Recommended): If performing on-column DNase digestion, apply the DNase I mixture directly to the center of the dry silica membrane and incubate at room temperature for 15 minutes [3].
- Elution: Apply 30-50 µL of nuclease-free water (or the kit's elution buffer) directly to the center of the silica membrane. Incubate at room temperature for 5 minutes to increase elution efficiency. Centrifuge to elute the purified RNA. Store RNA at -80°C.
FAQs: RNAlater Application and Troubleshooting
Q1: How do I properly use RNAlater for different sample types?
For effective RNA stabilization, the protocol varies slightly depending on your sample. For fresh tissue, dissect the sample to a maximum thickness of 0.5 cm in any one dimension and completely submerge it in 5 volumes of RNAlater. For cultured cells, first pellet the cells by centrifugation, resuspend them in a small volume of phosphate-buffered saline (PBS), and then mix with 5-10 volumes of RNAlater [54]. Once immersed in RNAlater, samples can be stored at various temperatures: up to 1 day at 37°C, 1 week at 25°C, 1 month or more at 4°C, and long-term at -20°C or -80°C [54].
Q2: What are the advantages of RNAlater over traditional snap-freezing in liquid nitrogen?
RNAlater offers several key practical advantages. It eliminates the laborious, messy, and risky process of grinding frozen tissue to a powder, which can lead to sample loss or thawing that compromises RNA integrity. Tissues preserved in RNAlater are protected from RNases and can typically be disrupted using simpler methods appropriate for fresh samples. The only exceptions are extremely hard or tough tissues like bone or tumor tissue, which may still require grinding in liquid nitrogen [54].
Q3: Is RNAlater compatible with my specific tissue type or downstream applications?
RNAlater has been successfully tested with a wide range of tissues including brain, heart, kidney, liver, skeletal muscle, fat, and lung, as well as various cell types such as E. coli, Drosophila, cultured mammalian cells, and some plant cells [54]. It is compatible with all commonly used RNA isolation methods and also allows for the extraction of genomic DNA and total protein from preserved samples. However, note that RNAlater denatures proteins, making them suitable only for analyses like Western blotting that don't require native protein [54] [55].
Q4: Can I use RNAlater with already frozen samples?
For samples that are already frozen, a different product called RNAlater-ICE is recommended. This solution is specifically designed to transition tissue from a frozen to a non-frozen state while protecting RNA integrity. Simply place the frozen tissue in RNAlater-ICE and leave it at -20°C overnight. The treated tissues can then be processed like fresh tissue using standard homogenization and isolation protocols [54].
Q5: I see a precipitate in my RNAlater solution. Is this normal?
Yes, the formation of a precipitate in RNAlater solution is normal and does not affect its performance. To redissolve the precipitate, heat the solution to 37°C for 15 minutes and agitate it before use [55].
Troubleshooting Common RNA Preservation and Isolation Issues
Problem: Low RNA Yield
| Cause | Solution |
|---|---|
| Incomplete homogenization | For tough tissues, use cryogenic conditions or more aggressive lysing matrices. Increase homogenization time or use a bead beater for difficult samples [56]. |
| Incomplete elution from column | After adding nuclease-free water during elution, incubate for 5-10 minutes at room temperature before centrifugation. Use the largest elution volume that gives your required concentration [56]. |
| Sample degradation during storage | Ensure samples are stored at -80°C immediately after collection when not using preservation reagents. For tissues in RNAlater, archive at -20°C or lower [56]. |
| Overwhelmed binding capacity | Reduce the amount of starting material to fall within kit recommendations. Precisely weigh tissue samples to ensure consistent loading [56]. |
Problem: RNA Degradation
RNA degradation manifests as smeared bands on a gel, or a 28S:18S rRNA ratio of less than 2:1. On a Bioanalyzer, you would see a decreased RNA Integrity Number (RIN) and a larger 18S peak compared to 28S [35].
| Cause | Solution |
|---|---|
| Improper sample handling | Add beta-mercaptoethanol (BME) to lysis buffer (10 µL of 14.3M BME per 1 mL of lysis buffer) to inactivate RNases and stabilize samples during extraction [35] [56]. |
| RNase contamination | Thoroughly clean work surfaces with an RNase decontamination solution. Use RNase-free consumables and change gloves frequently during RNA handling [56]. |
| Excessive heat during homogenization | Homogenize in bursts of 30-45 seconds with 30-second rest periods to avoid overheating. For sensitive samples, consider using a cryo-cooled homogenizer [56]. |
Problem: DNA Contamination
| Cause | Solution |
|---|---|
| Insufficient DNA shearing | Use a method that sufficiently breaks genomic DNA, such as high-velocity bead beating or a polytron rotor stator [35]. |
| Inefficient DNase treatment | Perform an on-column or in-solution DNase treatment. For samples rich in gDNA (e.g., spleen), use a high-activity DNase kit [35]. |
| Incorrect phenol pH | When using phenol methods, ensure the phenol has an acidic pH to properly separate RNA from DNA [35]. |
Problem: Unusual Spectrophotometric Readings
| Reading Issue | Possible Cause | Solution |
|---|---|---|
| Low A260/280 | Protein contamination | Ensure complete proteinase K digestion. Clean up the sample with another purification round. Use less starting material [56]. |
| Low A260/230 | Guanidine salt or organic compound carryover | Add extra wash steps with 70-80% ethanol in silica-based preps. For TRIzol preps, wash the precipitate with ethanol [35] [56]. |
| Silica particles in eluate | Column damage or over-centrifugation | Re-spin the eluted sample and carefully pipet from the top without disturbing any pellet [56]. |
Quantitative Data: Comparative Performance of Preservation Methods
The table below summarizes data from a systematic study comparing RNA preservation methods in human dental pulp tissue, demonstrating the performance advantages of RNAlater [52].
| Preservation Method | Mean RNA Yield (ng/μL) | Mean RNA Integrity Number (RIN) | Success Rate (Optimal Quality) |
|---|---|---|---|
| RNAlater Storage | 4,425.92 ± 2,299.78 | 6.0 ± 2.07 | 75% |
| RNAiso Plus Reagent | Not fully quantified (1.8x lower than RNAlater) | Not specified | Not specified |
| Snap Freezing (Liquid N₂) | 384.25 ± 160.82 | 3.34 ± 2.87 | 33% |
Experimental Protocol: RNA Preservation with RNAlater
Tissue Sample Collection and Preservation
- Prepare Tissue: Immediately after dissection, trim tissue to be less than 0.5 cm in at least one dimension to allow for rapid penetration of the reagent [57] [55].
- Submerge in RNAlater: Place tissue in 5 volumes of RNAlater Solution (e.g., 0.5 g of tissue requires approximately 2.5 mL of RNAlater) [57] [55].
- Initial Incubation: Store samples at 4°C overnight to allow for complete penetration. Do not homogenize immediately after immersion [55].
- Long-Term Storage: After overnight incubation at 4°C, transfer samples to -20°C or -80°C for long-term archiving. RNAlater will freeze at -80°C, but this does not affect performance [54] [55].
Cell Culture Sample Preservation
- Harvest Cells: Pellet cells by centrifugation.
- Wash Pellet: Resuspend the cell pellet in a small volume of PBS.
- Add RNAlater: Mix the cell suspension with 5-10 volumes of RNAlater [54].
- Storage: Store cell samples using the same temperature guidelines as for tissue samples.
RNA Isolation from RNAlater-Preserved Samples
- Remove RNAlater: For tissue, remove the sample from RNAlater and blot on an absorbent lab wipe. For cells, pellet them and pour off the supernatant [55].
- Proceed to Lysis: Homogenize the sample in an appropriate lysis buffer. Most tissues can be homogenized directly, though very hard tissues may still require cryogenic grinding [54] [55].
- Standard RNA Isolation: Continue with your preferred RNA isolation method (single-step reagent, silica column, etc.). RNAlater is compatible with standard RNA isolation kits [54].
Workflow Diagrams
RNAlater Sample Preservation Workflow
RNA Isolation Troubleshooting Decision Tree
Research Reagent Solutions
| Reagent | Primary Function | Key Applications |
|---|---|---|
| RNAlater Stabilization Solution | Rapidly penetrates tissues to stabilize and protect cellular RNA by inactivating RNases. Eliminates immediate processing or freezing in liquid nitrogen [57]. | Long-term storage of various tissues and cells; field collection; archiving. |
| RNAlater-ICE | Enables transition of frozen tissue samples to a state that can be processed like fresh tissue without RNA degradation during thawing [54]. | Working with already frozen archived samples; avoids grinding of frozen tissues. |
| RNAiso Plus | Monophasic reagent containing phenol and guanidine isothiocyanate for effective RNA isolation. Maintains RNA integrity during extraction [52]. | Single-step RNA isolation; particularly effective for difficult tissues. |
| Boom's Lysis Buffer | Contains high concentrations of chaotropic salts that enable nucleic acid adsorption to silica particles. Effective for long-term blood sample storage [58]. | Biobanking of blood samples; cost-effective long-term storage. |
| Beta-Mercaptoethanol (BME) | Strong reducing agent added to lysis buffers to inactivate RNases by disrupting disulfide bonds, thereby stabilizing RNA during extraction [35] [56]. | Essential addition to lysis buffers for RNase-rich tissues; improves RNA yield and quality. |
| DNase I (RNase-free) | Enzyme that degrades double-stranded and single-stranded DNA contaminants without damaging RNA. | Removal of genomic DNA contamination from RNA preparations; essential for PCR-based applications. |
FAQs: Addressing Common RNA Isolation Challenges
FAQ 1: My RNA yields from patient tumor biopsies are consistently low. What could be the cause and how can I improve this?
Low RNA yield is often due to incomplete sample lysis or degradation during collection. For clinical samples like tumor biopsies, immediate stabilization is critical.
- Cause: Incomplete homogenization of the fibrous tissue or degradation by high endogenous RNase activity before the sample is stabilized.
- Solution: Ensure complete tissue disruption by using a combination of mechanical homogenization and a lysis buffer containing a chaotropic salt (e.g., guanidinium isothiocyanate). For solid tissues, flash-freeze in liquid nitrogen immediately after resection or submerge in a stabilization reagent like RNAlater to preserve RNA integrity until processing. Using a more rigorous, phenol-based RNA isolation method (e.g., TRIzol Reagent) can also improve yields from difficult samples [3] [59].
FAQ 2: How can I confirm my RNA sample is free of genomic DNA contamination, and what is the most efficient removal method?
DNA contamination can skew quantification and cause false positives in sensitive applications like qPCR.
- Cause: Insufficient shearing of genomic DNA during homogenization or inefficient separation during extraction [35].
- Solution: The fastest method for confirming DNA contamination is to visualize the RNA on a gel and look for high molecular weight fragments above the 28S ribosomal RNA band. The most efficient removal method is "on-column" DNase digestion during the RNA isolation protocol. This is easier and allows for higher RNA recovery than post-purification DNase treatment [3] [59].
FAQ 3: My RNA has good A260/A280 ratios but performs poorly in RT-qPCR, with amplification occurring much later than expected. What is wrong?
This indicates the presence of PCR inhibitors that are not detected by standard UV spectroscopy.
- Cause: Your RNA sample may contain residual guanidine salts from the isolation procedure, ethanol, or other compounds that partially inhibit the reverse transcription or PCR enzymes [60] [61].
- Solution: Ensure wash steps are carried out thoroughly during column-based purification. If contamination is suspected, re-purify the RNA using a dedicated RNA cleanup kit, being careful not to contact the column with the flow-through. For samples already purified, ethanol precipitation can help to desalt the RNA [60] [35].
FAQ 4: What are the best practices for storing purified RNA to ensure long-term stability?
Improper storage leads to degradation and hydrolysis, rendering samples unusable.
- Solution: Divide purified RNA into single-use aliquots to prevent damage from multiple freeze-thaw cycles. For short-term storage (up to a few weeks), store at –20°C. For long-term storage, keep aliquots at –80°C. Use RNase-free water or a specialized RNA storage solution for elution, and ensure storage tubes are tightly sealed to prevent moisture buildup [3] [2].
Troubleshooting Guide: RNA Degradation and Quality Issues
This guide helps you diagnose and solve the most frequent problems encountered during RNA preparation.
| Problem | Possible Cause | Solution |
|---|---|---|
| Low RNA Yield | Incomplete sample lysis or homogenization [59]. | Increase homogenization intensity or duration; use bead beating for tough cells [59]. |
| RNA with high secondary structure (e.g., small RNAs) [60]. | For RNAs <45 nt, adjust binding conditions by adding 2 volumes of ethanol instead of one [60]. | |
| Incomplete elution from column [60]. | Ensure elution buffer is applied directly to the membrane; use larger volumes or multiple elutions [60]. | |
| Degraded RNA | RNase contamination during handling [60]. | Use RNase-free tips and tubes; frequently change gloves; treat surfaces with RNase decontamination solution [3] [33]. |
| Improper sample stabilization post-collection [3]. | Flash-freeze in liquid nitrogen or immerse in stabilization reagent (e.g., RNAlater, DNA/RNA Shield) immediately upon collection [3] [59]. | |
| Sample allowed to thaw during processing [35]. | Keep samples frozen until homogenization in lysis buffer; add beta-mercaptoethanol (BME) to lysis buffer to inactivate RNases [35]. | |
| DNA Contamination | Inefficient DNA shearing or separation [35]. | Use a homogenization method that sufficiently shears genomic DNA [35]. |
| Lack of a dedicated DNA removal step [3]. | Perform on-column DNase digestion during the RNA isolation procedure [3] [59]. | |
| Poor A260/A230 Ratio (Salt Contamination) | Residual guanidine salt carryover [60] [35]. | Add extra wash steps with 70-80% ethanol to the column [35]. |
| Inhibition in Downstream Apps | Carryover of ethanol, salts, or proteins [60] [61]. | Ensure the column does not contact flow-through; re-centrifuge briefly before elution. Re-purify the RNA if necessary [60]. |
Sample-Specific Protocols and Yield Guidelines
Different sample types present unique challenges. The table below summarizes recommended methods and expected RNA yields for common sample types.
| Sample Type | Key Challenge | Recommended Method | Typical Total RNA Yield (as guide) |
|---|---|---|---|
| Clinical Tumor Biopsies | Small, precious samples; high RNases. | Stabilize in RNAlater; use column-based kits (e.g., PureLink RNA Mini Kit) or phenol-chloroform. | Varies greatly by tissue; use a dedicated kit for micro-samples. |
| Cell Cultures (incl. Cancer) | Rapid RNA degradation upon cell death. | Direct lysis in chaotropic buffer; column-based purification. | 5-15 µg per 10^6 cells [3]. |
| Whole Blood | High RNases; complex cell types; PCR inhibitors (hemoglobin). | Use kits designed for whole blood (e.g., Quick-RNA Whole Blood); prioritize stabilization [59]. | Highly variable; depends on white cell count. |
| Fat-Rich Tissues (e.g., Brain, Breast) | High lipid content co-purifies with RNA. | Phenol-based RNA isolation (e.g., TRIzol Reagent) [3]. | ~50-100 µg per 100 mg tissue [3]. |
| Plant Tissues | Rigid cell walls; high levels of polysaccharides/polyphenolics. | Kits with specialized lysis (e.g., Quick-RNA Plant); may require CTAB protocol [59] [2]. | Varies by species and tissue. |
| Microbes (Bacteria, Fungi) | Tough cell walls refractory to lysis. | Bead beating combined with lysis buffer; specialized kits (e.g., Quick-RNA Fungal/Bacterial) [59]. | Varies by species and growth phase. |
| Environmental Water (eRNA) | Very low RNA concentration; diverse inhibitors. | Filtration followed by extraction with inhibitor removal technology (e.g., ZymoBIOMICS RNA Miniprep) [59] [62]. | Not standardized; depends on biomass. |
Experimental Protocol: Environmental RNA (eRNA) Metatranscriptomics
This protocol is adapted from studies investigating the response of aquatic eukaryotic communities to herbicide exposure [62].
1. Sample Collection:
- Collect water samples from the desired environment (e.g., 500 mL from a mesocosm).
- Filter immediately on-site through 0.7 µm glass microfiber filters to capture biomass. Complete filtration within 30 minutes of collection to prevent RNA degradation.
2. RNA Stabilization:
- Place the filter directly in a tube containing a lysis/stabilization buffer (e.g., RLT buffer with β-mercaptoethanol).
- Immediately place samples on dry ice and transfer to -80°C for long-term storage.
3. RNA Extraction:
- Use an RNA isolation kit designed for environmental samples that effectively removes inhibitors (e.g., humic acids). The ZymoBIOMICS RNA Miniprep is one such recommended kit [59].
- Include an on-column DNase digestion step to remove contaminating genomic DNA.
4. RNA Quality Assessment:
- Quantity RNA using a fluorometric method (e.g., Qubit) for accuracy with dilute samples.
- Assess integrity using capillary electrophoresis (e.g., Agilent Bioanalyzer) to obtain an RNA Integrity Number (RIN). A minimum RIN of 7 is often recommended for transcriptomic studies [3].
The following workflow diagram illustrates the key steps for processing environmental RNA samples.
The Scientist's Toolkit: Research Reagent Solutions
This table catalogs essential reagents and materials for successful RNA isolation across various scenarios.
| Item | Function & Application |
|---|---|
| DNA/RNA Shield (Zymo Research) | Stabilization reagent that inactivates nucleases upon contact. Ideal for field sampling or precious clinical samples, allowing storage at ambient temp [59]. |
| RNaseZap (Thermo Fisher) | Surface decontamination solution/wipes. Critical for creating an RNase-free workspace by quickly degrading RNases on benchtops, pipettors, etc [3]. |
| PureLink DNase Set (Thermo Fisher) | Facilitates easy on-column DNase digestion during RNA purification, removing genomic DNA contamination more efficiently than post-purification treatment [3]. |
| TRIzol Reagent | Monophasic solution of phenol and guanidine isothiocyanate. Ideal for simultaneous isolation of RNA, DNA, and proteins; recommended for difficult, nuclease-rich, or fat-rich samples [3]. |
| Protector RNase Inhibitor (Roche) | Added to reactions post-RNA isolation (e.g., reverse transcription) to protect RNA from degradation by a broad spectrum of RNases [33]. |
| RNA Clean & Concentrator Kits (Zymo Research) | Used for cleaning up RNA from enzymatic reactions, aqueous phases, or to remove salts/inhibitors from already-purified samples [59]. |
Advanced Application: Targeted RNA Degradation in Cancer Research
A cutting-edge application in cancer research involves the targeted degradation of specific RNA molecules that cancer cells depend on for survival. One promising technology is the Ribonuclease-Targeting Chimera (RIBOTAC).
Therapeutic Strategy: The RIBOTAC approach involves a bifunctional small molecule. One part of the molecule is designed to bind with high specificity to a unique structural motif (e.g., a G-quadruplex) in a non-coding RNA, such as the lncRNA TERRA, which is exploited by cancer cells. The other part of the molecule recruits a ubiquitous endogenous cellular ribonuclease, RNase L. This recruitment brings the destructive enzyme into proximity with the target RNA, leading to its selective cleavage and degradation [63] [64].
Experimental Workflow:
- Identify Target RNA: Validate a specific RNA (e.g., TERRA) that is critical for cancer cell survival and proliferation.
- Design RIBOTAC Molecule: Use platforms like INFORNA to design a small molecule that binds a unique structural element in the target RNA. Chemically tether this binder to an RNase L-recruiting module.
- Validate In Vitro: Treat cancer cell lines (e.g., HeLa, U2OS) with the RIBOTAC molecule.
- Assess Efficacy: Measure the reduction in target RNA levels (e.g., via qRT-PCR) and the subsequent slowing of cancer cell growth [63] [64].
The diagram below illustrates the mechanism of the RIBOTAC strategy.
Solving Common RNA Prep Problems: A Step-by-Step Troubleshooting Guide
RNA degradation is a critical challenge in molecular biology that can compromise the integrity of experimental data, from basic research to drug development. This technical support guide provides a systematic framework for diagnosing and resolving common RNA degradation issues, offering practical troubleshooting advice and proven methodologies to ensure sample quality and data reliability.
Understanding RNA Integrity: Key Concepts and Metrics
RNA Integrity Number (RIN) serves as the gold standard for assessing RNA quality. This algorithmic assessment provides a score between 1 and 10, with 10 representing perfectly intact RNA and 1 indicating completely degraded RNA [65]. The RIN system evaluates the entire electrophoretic trace of an RNA sample, offering a standardized metric that enables reproducible quality control across experiments and laboratories [66].
For most downstream applications, including quantitative PCR and microarray analysis, a minimum RIN of 7 is generally recommended to ensure reliable results [3]. However, techniques like qRT-PCR can sometimes tolerate samples with RIN values as low as 2, though with potential compromises in data quality [3]. Research demonstrates that RNA degradation significantly impacts transcriptomic profiles, with one study identifying 1,945 genes (6.7% of 29,230 analyzed) showing altered quantification when RIN values drop [66].
Beyond RIN, traditional spectrophotometric measurements provide complementary quality indicators:
- A260/A280 ratio indicates protein contamination, with acceptable ratios for pure RNA falling between 1.8-2.0 [3]
- A260/A230 ratio detects organic compound contamination, with values below 1.0 suggesting potential guanidine salt carryover or other inhibitors [35]
Table 1: RNA Quality Metrics and Interpretation
| Quality Metric | Target Value | Potential Issue | Impact on Downstream Applications |
|---|---|---|---|
| RIN | ≥7 [3] | Degradation | Biased gene expression profiles, particularly for short transcripts [66] |
| A260/A280 | 1.8-2.0 [3] | Protein contamination | Interference with enzymatic reactions in RT-PCR and sequencing [35] |
| A260/A230 | >2.0 [35] | Salt/organic compound carryover | Inhibition of reverse transcriptase and polymerase enzymes [35] |
Troubleshooting Common RNA Degradation Issues
Problem: Smearing on Gel Electrophoresis
Description: Smeared bands appear as diffused, fuzzy regions on the gel rather than sharp, distinct bands [67].
Potential Causes and Solutions:
Sample Degradation:
- Cause: RNase contamination during handling or incomplete inactivation of endogenous RNases [67] [35]
- Solution: Implement rigorous RNase-free techniques including wearing gloves, using RNase-free reagents and labware, and adding beta-mercaptoethanol (BME) to lysis buffer (10 μL of 14.3M BME per 1 mL of lysis buffer) [35]
Incorrect Gel Type:
Improper Electrophoresis Conditions:
Problem: Low RIN Values
Description: RNA samples with RIN values below the acceptable threshold for downstream applications [65].
Potential Causes and Solutions:
Improper Sample Collection and Storage:
- Cause: Delay between sample collection and stabilization [35] [3]
- Solution: Immediately homogenize samples in chaotropic lysis buffer, flash-freeze in liquid nitrogen, or preserve in RNAlater solution [3]. For tissues, ensure pieces are small (<0.5 cm) to facilitate rapid penetration of preservatives [3]
Inefficient Homogenization:
Multiple Freeze-Thaw Cycles:
Problem: Genomic DNA Contamination
Description: High molecular weight smearing on gels or amplification in no-RT controls during PCR [35].
Potential Causes and Solutions:
- Cause: Insufficient shearing of genomic DNA during homogenization [35]
- Solution: Implement DNase treatment using room-temperature stable DNase kits. "On-column" DNase digestion is particularly efficient for removing contaminating DNA without significant RNA loss [35] [3]
Problem: Low RNA Yields
Description: RNA concentration lower than expected for the sample type [35].
Potential Causes and Solutions:
Incomplete Homogenization:
Suboptimal Elution from Silica Columns:
Table 2: Troubleshooting Guide for Common RNA Degradation Issues
| Problem | Primary Cause | Immediate Solution | Preventive Measures |
|---|---|---|---|
| Smearing on Gel | RNase contamination [67] | Use denaturing gels for RNA [67] | Maintain RNase-free environment; use appropriate loading buffers [67] [69] |
| Low RIN Values | Improper sample storage [3] | Assess integrity before experiments [65] | Immediate stabilization; minimize freeze-thaw cycles [3] |
| gDNA Contamination | Insufficient DNA shearing [35] | On-column DNase treatment [3] | Optimize homogenization; use specific kits for tough tissues [35] |
| Low Yields | Incomplete homogenization [35] | Increase elution volume [35] | Validate homogenization method; avoid overloading columns [35] [3] |
Experimental Protocols for RNA Integrity Assessment
Gel Electrophoresis for RNA Quality Check
Principle: Intact RNA displays sharp ribosomal RNA bands (28S and 18S for eukaryotic RNA) with the 28S band approximately twice the intensity of the 18S band. Degraded RNA appears as a smear with diminished or absent ribosomal bands [35].
Protocol:
- Gel Preparation: Cast a denaturing agarose gel (e.g., 1-1.2%) containing an appropriate fluorescent stain [67] [68]
- Sample Loading: Mix RNA sample with denaturing loading buffer and load 0.1-0.2 μg of RNA per millimeter of gel well width [67]
- Electrophoresis: Run gel at 110-130V in appropriate buffer until adequate separation is achieved [68]
- Visualization: Image gel using appropriate excitation wavelength for the stain used [67]
Troubleshooting Gel Issues:
- Faint Bands: May indicate low sample quantity, degraded RNA, or insufficient staining [67]
- No Bands: Check electrophoresis parameters, staining method, or possible PCR amplification failure if analyzing amplified products [68]
- Sample Stuck in Wells: Could indicate protein contamination, overloading, or incorrect voltage [68]
RNA Integrity Number (RIN) Assessment
Principle: Capillary electrophoresis systems (e.g., Agilent Bioanalyzer) separate RNA fragments by size and generate an electrophoretogram from which the RIN algorithm calculates integrity based on the entire trace, not just ribosomal ratios [66].
Protocol:
- Sample Preparation: Dilute RNA to appropriate concentration (typically 50-500 pg/μL) in nuclease-free water [66]
- Chip Preparation: Load gel-dye mix and samples into designated wells on the specialized chip [66]
- Instrument Run: Process chip according to manufacturer's instructions [66]
- Data Analysis: Review generated electrophoretogram and RIN value [65]
Interpretation:
- RIN 9-10: Excellent quality - ideal for sensitive applications like RNA-Seq
- RIN 7-8: Good quality - acceptable for most applications including microarrays
- RIN 5-6: Moderate quality - may introduce bias in gene expression studies
- RIN <5: Poor quality - use with caution and only for robust applications [65] [66]
Impact of RNA Degradation on Downstream Applications
RNA degradation significantly impacts various molecular biology techniques, with consequences ranging from subtle biases to complete experimental failure:
RNA Sequencing: Degraded RNA causes 3' bias, loss of transcript coverage, and inaccurate gene expression quantification. Short transcripts and those with short distances between their 5' end and probe binding position are particularly affected [70] [66]
qRT-PCR: Results in reduced amplification efficiency and potentially false negatives, especially for longer amplicons or low-abundance transcripts [71]
Microarray Analysis: Causes altered fluorescent signals and compromised comparison between samples, with one study showing approximately 6.7% of genes displaying altered quantification in degraded samples [66]
Best Practices for Preventing RNA Degradation
Establishing an RNase-Free Environment
RNases are ubiquitous enzymes that rapidly degrade RNA. Unlike DNases, RNases are notoriously difficult to inactivate as they do not require cofactors and can refold after denaturation [69]. Key practices include:
- Personal Protection: Always wear gloves and change them frequently, as skin is a common source of RNase contamination [69]
- Dedicated Workspace: Maintain separate areas for RNA work and decontaminate surfaces with specialized solutions like RNaseZap before and after use [3] [69]
- RNase-Free Reagents: Use only certified RNase-free water, tubes, and tips [35] [69]
- Equipment Reservation: Designate specific pipettors and labware exclusively for RNA work to prevent cross-contamination [69]
Sample Collection and Stabilization
Rapid stabilization of RNA upon sample collection is critical for preserving integrity:
- Immediate Homogenization: Homogenize tissues and cells immediately in chaotropic lysis buffers (e.g., guanidinium-based) that inactivate RNases [3]
- Chemical Stabilization: Use RNA stabilization reagents like RNAlater for tissues that cannot be processed immediately [3]
- Flash Freezing: Snap-freeze samples in liquid nitrogen, ensuring tissue pieces are small enough to freeze instantly [3]
- Temperature Control: Keep samples on ice throughout processing to minimize RNase activity [69]
RNA Isolation and Storage
Choosing the appropriate isolation method and proper storage conditions ensures long-term RNA preservation:
Method Selection:
Storage Conditions:
The Scientist's Toolkit: Essential Reagents and Solutions
Table 3: Research Reagent Solutions for RNA Integrity Preservation
| Reagent Type | Specific Examples | Function | Application Notes |
|---|---|---|---|
| RNase Decontamination | RNaseZap Solution/Wipes [3] | Surface decontamination | Critical for benches, pipettors, and instrumentation |
| Stabilization Solutions | RNAlater Stabilization Solution [3] | Tissue RNA stabilization | Permeates tissue to stabilize RNA prior to extraction |
| Lysis Buffers | Guanidinium-based buffers [35] [3] | Cell lysis & RNase inactivation | Chaotropic salts denature proteins including RNases |
| Reducing Agents | Beta-mercaptoethanol (BME) [35] | RNase inhibition | Add to lysis buffer (10μL/mL of 14.3M BME) |
| DNase Treatment | PureLink DNase Set [3] | gDNA removal | On-column digestion is more efficient than post-isolation |
| Isolation Kits | PureLink RNA Mini Kit [3] | Total RNA isolation | Ideal for most sample types; includes DNase treatment option |
| Phenol-Based Reagents | TRIzol Reagent [35] [3] | RNA isolation | Recommended for difficult samples (high nuclease/fat content) |
| Storage Solutions | THE RNA Storage Solution [3] | RNA resuspension/storage | Certified RNase-free buffer minimizes base hydrolysis |
Frequently Asked Questions (FAQs)
Q1: What is the minimum RIN value acceptable for RNA-Seq experiments? While requirements vary by application, most RNA-Seq protocols recommend a minimum RIN of 7. However, some robust applications may tolerate values as low as 5, with the understanding that degradation introduces bias, particularly for shorter transcripts [65] [66].
Q2: Why do I see smearing in my RNA samples even though I work quickly and use RNase-free reagents? Smearing can result from various factors beyond obvious RNase contamination: (1) incomplete homogenization leaving endogenous RNases active, (2) using standard gels instead of denaturing gels for RNA electrophoresis, (3) excessive voltage during electrophoresis (>150V) generating heat, or (4) sample overload in gel wells [67] [68].
Q3: How can I remove genomic DNA contamination from my RNA samples? The most effective approach is on-column DNase digestion during RNA purification. This method is more efficient than post-isolation treatment and results in higher RNA recovery. For samples with persistent gDNA contamination, consider using high-activity DNase kits specifically designed for complete DNA removal [35] [3].
Q4: My RNA samples have good A260/A280 ratios but my downstream applications fail. Why? The A260/A280 ratio primarily detects protein contamination but doesn't reveal RNA integrity or the presence of certain inhibitors. Check your A260/A230 ratio, as values below 1.0 may indicate guanidine salt or organic compound carryover that inhibits enzymatic reactions. Also assess RNA integrity by gel electrophoresis or RIN measurement [35] [72].
Q5: What is the best method for long-term RNA storage? For long-term preservation, store RNA at -80°C in single-use aliquots to prevent freeze-thaw cycles. Use specialized RNA storage solutions rather than nuclease-free water alone, as these buffers minimize base-catalyzed hydrolysis. Avoid storing RNA at -20°C for extended periods [3].
Maintaining RNA integrity from sample collection through analysis requires diligent attention to technique, appropriate choice of reagents, and systematic quality control. By implementing the troubleshooting strategies and best practices outlined in this guide, researchers can significantly improve RNA quality, ensuring the reliability and reproducibility of their molecular analyses and ultimately supporting robust scientific conclusions in both basic research and drug development contexts.
FAQs: Addressing Common DNase Treatment Challenges
Why is DNase treatment necessary, and can't my RNA isolation kit remove all DNA?
Virtually no RNA isolation method consistently yields RNA completely free of genomic DNA (gDNA) [73] [74]. This contaminating DNA can serve as a template during sensitive downstream applications like RT-PCR or RNA-Seq, leading to false positive signals and inaccurate data interpretation [73] [74]. DNase treatment is therefore the definitive method to degrade this residual DNA, ensuring your results truly reflect RNA-derived signals.
How can I tell if my RNA sample is contaminated with genomic DNA?
Several methods can detect gDNA contamination, each with different sensitivity levels [74]:
- PCR with "minus-RT" control: This is the most sensitive method. Perform a PCR reaction on your RNA sample without adding reverse transcriptase. Any amplified product indicates contaminating DNA [73] [3].
- Agarose Gel Electrophoresis: The presence of a high molecular weight band above the ribosomal RNA bands can indicate gDNA contamination [74].
- Fragment Analyzer or Bioanalyzer: A high molecular weight "bump" in the trace suggests gDNA presence [74].
- Spectrophotometry (A260/A280): While a ratio below 2.0 can indicate DNA contamination, this method is less reliable for detecting low-level contamination that can still interfere with highly sensitive applications like RNA-Seq [3] [74].
What is the best way to inactivate and remove DNase after treatment?
Effective DNase removal is critical, as residual enzyme can degrade cDNA in subsequent steps. Common methods have pros and cons [75] [73]:
- Heat Inactivation (e.g., 75°C for 10 min): A simple method, but heating RNA in the presence of divalent cations (from the DNase buffer) can cause enzyme-independent RNA degradation [73].
- Phenol:Chloroform Extraction: Effective at protein removal but is time-consuming, involves hazardous chemicals, and can lead to RNA loss [75] [73].
- Use of a DNase Inactivation Reagent: A specialized reagent is added post-digestion to sequester the DNase and cations. After a brief incubation, the complex is pelleted by centrifugation, leaving clean RNA in the supernatant. This method is fast, effective, and avoids the risks of heat or phenol [75] [73].
- On-Column DNase Treatment: Many kits allow you to apply DNase directly to the RNA-bound silica membrane. This localizes the reaction and allows for easy removal of the enzyme in subsequent wash steps, which is highly efficient and minimizes RNA loss [3].
My RNA is degraded after DNase treatment. What went wrong?
Degradation post-DNase treatment often occurs during the inactivation step. If using heat inactivation, the combination of high temperature and divalent cations (Mg²⁺, Ca²⁺) in the digestion buffer can catalyze RNA strand scission [73] [2]. Switching to a non-heat-based inactivation method, such as a dedicated inactivation reagent or an on-column treatment protocol, typically resolves this issue.
Troubleshooting Guide: DNase Treatment in Practice
Problem: Incomplete DNA Digestion
Potential Causes and Solutions:
- Cause 1: Insufficient DNase or Incubation Time. The amount of DNA contamination may have exceeded the capacity of the protocol.
- Cause 2: Suboptimal Reaction Buffer. DNase I requires both Mg²⁺ and Ca²⁺ for optimal activity. Activity drops significantly in buffers lacking Ca²⁺ or with high ionic strength [75].
- Solution: Always use an optimized DNase reaction buffer, typically containing 100 mM Tris pH 7.5, 25 mM MgCl₂, and 5 mM CaCl₂ [75].
- Cause 3: Difficult Sample Types. Tissues like spleen, thymus, or transfected cells contain high DNA levels. Bacterial DNA in sputum samples is also notoriously difficult to remove [75] [76].
- Solution: For tough samples, combine mechanical disruption (e.g., bead vortexing) with an optimized kit that includes a gDNA eliminator column. This approach can lyse cells more thoroughly, making DNA more accessible to DNase digestion [76].
Problem: Low RNA Yield After DNase Treatment
Potential Causes and Solutions:
- Cause 1: RNA Loss During Inactivation/Clean-up. Steps like phenol:chloroform extraction or ethanol precipitation can lead to significant RNA loss.
- Cause 2: Degradation During Heat Inactivation.
- Solution: As above, switch to a non-heat-based inactivation method to protect RNA integrity [73].
Experimental Protocols & Best Practices
Standard DNase I Treatment Protocol for RNA Samples
This protocol is suitable for removing up to 1 µg of DNA from RNA in a 25–100 µL reaction volume [75].
Materials:
- RNase-free DNase I
- 10X DNase I Buffer (e.g., 100 mM Tris-HCl pH 7.5, 25 mM MgCl₂, 5 mM CaCl₂)
- RNase-free water
- DNase Inactivation Reagent (optional, but recommended)
Method:
- Set Up Reaction: For ~10 µg of RNA, combine the following in a nuclease-free tube:
- RNA sample (diluted to ≤ 100 µg/mL nucleic acid concentration)
- 2-4 units of DNase I
- 1/10th volume of 10X DNase I Buffer
- RNase-free water to a final volume of 25-100 µL.
- Incubate: Mix gently and incubate at 37°C for 30-60 minutes [75].
- Inactivate DNase (using a removal reagent):
Workflow: Detecting and Solving gDNA Contamination
The following diagram outlines a logical workflow for identifying and addressing genomic DNA contamination in RNA samples.
Quantitative Data for DNase Treatment
Table 1: Recommended DNase I Digestion Conditions [75]
| Condition | Recommendation | Notes |
|---|---|---|
| RNA Concentration | Dilute to ~100 µg/mL | Prevents overloading; ensures efficient digestion. |
| DNase I Amount | 2 units per ~10 µg RNA | Heavily contaminated samples may require 4-6 units. |
| Typical Incubation | 30-60 minutes at 37°C | Prolonged incubation (>1 hr) may increase degradation risk. |
| Essential Cations | Mg²⁺ and Ca²⁺ | Both are required for optimal activity. |
Table 2: Comparison of Common DNase Inactivation Methods
| Method | Procedure | Advantages | Disadvantages |
|---|---|---|---|
| Heat Inactivation [73] | 75°C for 5-10 min | Simple, no extra reagents. | Can degrade RNA via cation-mediated hydrolysis. |
| Phenol:Chloroform Extraction [75] [73] | Organic extraction, phase separation | Effective enzyme removal. | Time-consuming, hazardous phenol, risk of RNA loss. |
| EDTA Chelation [73] | Add EDTA to chelate Mg²⁺/Ca²⁺ | Inactivates DNase without heat. | Requires adjustment of cation levels for downstream enzymes. |
| DNase Inactivation Reagent [75] [73] | Bind DNase, spin down | Fast (minutes), safe, high RNA recovery. | Requires purchase of specific kit/reagent. |
| On-Column Treatment [3] | Apply DNase to silica membrane | Minimal hands-on time, no separate clean-up. | Only applicable during specific RNA isolation kits. |
The Scientist's Toolkit: Essential Reagents for DNase Treatment
Table 3: Key Research Reagent Solutions
| Item | Function | Key Considerations |
|---|---|---|
| RNase-free DNase I | Degrades single- and double-stranded DNA contaminants. | Ensure it is certified RNase-free to prevent RNA degradation. Activity can vary by supplier and lot [75] [77]. |
| Optimized DNase Buffer | Provides optimal pH and essential divalent cations (Mg²⁺, Ca²⁺) for DNase I activity. | Critical for full enzymatic activity. Using the wrong buffer is a common cause of failed digestion [75]. |
| gDNA Eliminator Spin Columns | A specialized column designed to selectively bind and remove genomic DNA during RNA purification. | Often part of "Plus" or "Advanced" kit formats. More effective than standard silica membranes for gDNA [76]. |
| DNase Inactivation Reagent | A proprietary matrix that binds and removes DNase enzyme and cations post-digestion. | Enables simple, rapid, and safe inactivation without heat or phenol, preserving RNA integrity [75] [73]. |
| RNase Inactivation Solutions | Sprays or wipes used to decontaminate surfaces, pipettes, and equipment. | Essential for preventing introduction of environmental RNases that would degrade your RNA samples during handling [3] [2]. |
A technical guide for researchers battling RNA degradation.
Ensuring high-yield, high-integrity RNA extraction is a foundational step in molecular biology. This guide addresses common low-yield challenges by providing targeted, evidence-based troubleshooting for homogenization, elution, and sample loading protocols.
Frequently Asked Questions
1. My RNA yields are consistently low, even with what seems like sufficient starting material. What are the primary causes? Low yields typically stem from three main areas: incomplete sample homogenization (preventing full RNA release), inefficient elution from purification columns, or overloading of the purification system beyond its binding capacity [78] [3] [79]. A systematic check of your homogenization method, elution incubation time, and adherence to kit input specifications is the best first step.
2. How can I tell if my low yield is due to degradation or just poor recovery? Assessment is key. Spectrophotometric measurements (A260/280 ratio) can indicate protein contamination, while a low A260/230 ratio suggests carryover of salts that can inhibit downstream reactions [78] [3]. For a definitive look at integrity, use instruments like the Agilent Bioanalyzer or TapeStation to generate an RNA Integrity Number (RIN). A RIN ≥7 is generally acceptable for most applications, with lower values indicating degradation [3] [27].
3. I work with difficult tissues (high in fat, nucleases, or fibrous material). What specific optimizations should I consider? Difficult samples require more robust lysis conditions. Consider moving from a standard column-based kit to a phenol-based method like TRIzol for more complete inactivation of nucleases and better recovery from complex matrices [3]. Furthermore, increasing the volume of lysis buffer, adding a Proteinase K digestion step (or doubling its concentration), and incorporating mechanical disruption like bead beating can dramatically improve results [78] [79].
4. My RNA is clean according to the Nanodrop, but my downstream RT-qPCR fails. What could be wrong? This often points to invisible contaminants or DNA contamination. The Nanodrop cannot detect carryover of guanidine salts from wash buffers, which are potent inhibitors of enzymatic reactions [78]. Ensure you are performing all wash steps and centrifuging the column dry before elution. Furthermore, always perform an on-column DNase I treatment to remove genomic DNA that can cause false-positive signals in sensitive applications like RT-qPCR [3] [79].
Troubleshooting Guide: From Cause to Solution
The following table outlines common problems, their root causes, and specific corrective actions to boost your RNA yield and quality.
| Problem | Primary Cause | Recommended Solution |
|---|---|---|
| Clogged Column | Incomplete homogenization; Too much starting material [78] | Increase homogenization/digestion time; Centrifuge to pellet debris before loading; Reduce input material to kit specifications [78] [79]. |
| Low Yield | Incomplete sample lysis or disruption [78] [79] | Optimize lysis regimen (e.g., add Proteinase K, use bead beating for tough tissues); Ensure denaturant contacts cellular contents instantly upon disruption [3] [80]. |
| Low Yield | Inefficient elution from column [78] | Incubate elution buffer on the column membrane for 5-10 minutes at room temperature before centrifugation [78]. |
| Low Yield / Degradation | Sample not stabilized post-collection; RNase contamination [2] [33] | Snap-freeze in LN₂ or use stabilization reagents (e.g., RNAlater, DNA/RNA Shield). Always wear gloves, use RNase-free tips/tubes, and decontaminate surfaces with RNaseZap [3] [79] [2]. |
| DNA Contamination | Genomic DNA not removed [78] [79] | Perform an on-column DNase I digestion during the purification workflow. This is more efficient than post-purification treatments [3] [79]. |
| Poor Downstream Performance | Carryover of inhibitory salts (e.g., guanidine) from wash buffers [78] | Ensure a 2-minute centrifugation after the final wash to dry the column membrane. Avoid contact between the column tip and flow-through [78]. |
Experimental Protocols for Yield Optimization
Protocol: Optimized Homogenization for Difficult Tissues
This protocol is designed for tissues high in RNases (e.g., pancreas) or lipids (e.g., brain, adipose) [3] [79].
- Key Principle: Instantaneous and complete inactivation of endogenous RNases upon tissue disruption.
Materials:
Method:
- Pre-chill the homogenizer on ice.
- Weigh a piece of fresh or stabilized tissue (≤30 mg is optimal for most mini-prep kits) [27].
- Immediately place the tissue into a tube containing 500 µL - 1 mL of cold lysis buffer.
- Homogenize thoroughly until no visible tissue fragments remain.
- For added efficiency, add 10-20 µL of Proteinase K (for a final concentration of 5-10%) and incubate at 55°C for 5-15 minutes [78].
- Centrifuge the lysate at >12,000 × g for 5 minutes at 4°C to pellet insoluble debris and fat.
- Carefully transfer the supernatant to a new RNase-free tube. Proceed directly to the RNA purification steps of your chosen kit.
Protocol: Maximizing Elution Efficiency
This protocol ensures you recover the maximum amount of RNA that has bound to the purification column [78].
- Key Principle: Allowing time for the elution buffer to fully rehydrate and displace the RNA from the silica membrane.
- Materials:
- Nuclease-free water or TE buffer
- Heating block or water bath (set to 37-55°C)
- Method:
- After the final wash and spin of your column-based kit, apply 30-50 µL of pre-warmed nuclease-free water (or TE buffer, pH 8.0) directly onto the center of the silica membrane.
- Close the tube lid and let the column stand at room temperature for 5-10 minutes [78].
- Centrifuge for 1 minute at 8,000–11,000 × g to elute the RNA.
- For maximum yield, you can perform a second elution with a fresh volume of buffer, though this will dilute your final sample [78].
Impact of Sample Handling on RNA Integrity
Recent research quantifies how pre-analytical handling directly affects RNA quality. A 2025 study systematically evaluated key variables using cryopreserved tissues [27]. The data below summarizes critical findings for experimental planning.
Table: Impact of Tissue Aliquot Size and Thawing Method on RNA Integrity (RIN) [27]
| Tissue Aliquot Size | Thawing on Ice (RIN) | Thawing at -20°C (RIN) | Key Takeaway |
|---|---|---|---|
| 10-30 mg | ≥ 8 [27] | Data not provided | Small aliquots are robust and maintain high integrity with ice thawing. |
| 70-100 mg | ≥ 7 [27] | ≥ 7 [27] | Both methods are acceptable, but RIN begins to drop. |
| 250-300 mg | 5.25 ± 0.24 | 7.13 ± 0.69 | Larger tissues require a slower thaw at -20°C to preserve RNA quality. |
- Processing Delay: A 120-minute delay at 4°C before disruption resulted in a RIN of 9.38, which decreased to 8.45 after a 7-day delay under the same conditions [27].
- Preservative Use: Adding RNALater during the thawing process significantly improved RNA integrity compared to no preservative, especially when thawing on ice [27].
The Scientist's Toolkit: Essential Reagents for RNA Integrity
The following reagents and tools are critical for successful, high-yield RNA isolation.
| Reagent / Tool | Primary Function |
|---|---|
| Guanidine-based Lysis Buffer | A powerful chaotropic agent that denatures proteins and inactivates RNases immediately upon cell lysis [80] [2]. |
| DNA/RNA Stabilization Reagent (e.g., RNAlater, DNA/RNA Shield) | Preserves RNA integrity in freshly collected tissues/cells at ambient temperatures for transport and storage, preventing degradation before extraction begins [3] [80] [79]. |
| Proteinase K | Digests proteins and nucleases, aiding in the complete disruption of tough samples and increasing overall RNA yield and purity [78] [79]. |
| DNase I (RNase-free) | Enzymatically degrades contaminating genomic DNA during purification, which is essential for applications like RT-qPCR and RNA-Seq [3] [79]. |
| RNase Decontamination Spray (e.g., RNaseZap) | Decontaminates work surfaces, pipettors, and other equipment to prevent introduction of environmental RNases [3] [2]. |
Workflow Optimization for Maximum RNA Yield
This diagram maps the critical decision points and optimization strategies within a standard RNA extraction workflow to prevent yield loss.
We hope this technical support guide empowers your research. For further assistance, always consult the specific manual for your RNA extraction kit and contact the manufacturer's technical support team with detailed information about your sample and protocol.
Within the broader context of solving RNA degradation in sample preparation research, accurate assessment of RNA purity is a critical first step. Spectrophotometric measurements, specifically the A260/A280 and A260/A230 ratios, serve as primary indicators of protein and chemical contamination, respectively. Troublesome ratios are a frequent challenge that can compromise downstream applications and experimental validity. This guide addresses the root causes of suboptimal ratios and provides detailed protocols for remediation, ensuring the integrity of your RNA samples for drug development and research.
FAQ: Understanding RNA Purity Ratios
What do the A260/A280 and A260/230 ratios actually measure? The A260/A280 ratio estimates protein contamination in a nucleic acid sample. Acceptable ratios for pure RNA are typically between 1.8 and 2.2 [29]. The A260/A230 ratio assesses contamination from other compounds, such as salts or organic reagents (e.g., guanidine thiocyanate from purification kits); a ratio greater than 1.7 is generally acceptable [29]. It is important to note that these are estimates, and the required purity can vary with different downstream applications [29].
My RNA concentrations seem reasonable, but my purity ratios are poor. What does this mean? This is a common occurrence and indicates the presence of non-nucleic acid contaminants that are absorbing ultraviolet light. A low A260/A280 ratio suggests significant protein contamination [29]. A low A260/230 ratio is a strong indicator of residual salts, chaotropic agents, or other chemical contaminants that absorb strongly at 230 nm [29]. It is crucial to address these issues, as such contaminants can inhibit enzymes like reverse transcriptase and DNA polymerases, leading to failed or unreliable results.
Can the measurement method itself affect the purity ratios? Yes, the pH and ionic strength of the solution used to dilute the RNA for spectrophotometry can significantly impact the A260/A280 ratio. Measurements taken in low-pH water can yield artificially low ratios (e.g., ~1.5). Performing the measurement in a slightly alkaline buffer (e.g., pH 7.5-8.5) provides more reliable and reproducible ratios, closer to the expected 2.0 for pure RNA [81].
Troubleshooting Guide: Diagnosing and Correcting Poor Ratios
Diagnostic Table: Identifying Contaminants
The following table summarizes the common symptoms, their primary causes, and the potential impact on your research.
Table 1: Diagnosing Common Issues from Spectrophotometric Ratios
| Symptom | Likely Contaminant | Impact on Downstream Applications |
|---|---|---|
| Low A260/A280 (< 1.8) | Protein (e.g., phenolic compounds) [29] | Inhibition of enzymatic reactions (RT-PCR, ligation) |
| Low A260/230 (< 1.7) | Salts (e.g., guanidine thiocyanate, EDTA), carbohydrates [29] | Interference with enzymatic reactions and hybridization |
| Abnormal ratios with acceptable RNA Integrity Number (RIN) | Residual chemical contaminants from isolation | May not affect PCR if amplicons are small, but can disrupt more sensitive applications like microarray or sequencing [29] |
Step-by-Step Experimental Protocols for Remediation
Protocol 1: Optimized Ethanol Precipitation for Salt Removal
This protocol is effective for improving a poor A260/230 ratio by removing residual salts and solvents.
- Sample Preparation: Transfer your RNA sample to a nuclease-free microcentrifuge tube.
- Add Salt and Ethanol: Add 0.1 volumes of 3 M sodium acetate (pH 5.2) and mix thoroughly. Then, add 2.5 volumes of ice-cold 100% ethanol. Mix the solution by inverting the tube several times.
- Precipitate: Incubate the mixture at -20°C for a minimum of 30 minutes (or overnight for maximum yield).
- Pellet RNA: Centrifuge the tube at >12,000 × g for 20 minutes at 4°C to form an RNA pellet.
- Wash Pellet: Carefully decant the supernatant without disturbing the pellet. Wash the pellet with 1 mL of ice-cold 75% ethanol and centrifuge again at >12,000 × g for 10 minutes.
- Dry and Resuspend: Carefully remove all the ethanol and allow the pellet to air-dry for 5-10 minutes. Do not over-dry, as this will make the pellet difficult to resuspend. Finally, resuspend the purified RNA in RNase-free water or a specialized RNA storage solution [3].
Protocol 2: On-Column DNase Digestion for Protein and gDNA Removal
This method is highly effective for improving A260/A280 ratios and removing genomic DNA contamination during the purification process itself.
- Isolation: Proceed with your chosen column-based RNA isolation kit (e.g., PureLink RNA Mini Kit) according to the manufacturer's instructions until the first wash step [3].
- Prepare DNase I: While the column is washed, prepare the DNase I digestion mixture. For one reaction, combine 5 µL of 10× DNase I reaction buffer and 5 µL of recombinant DNase I (1 U/µL). Add 40 µL of RNase-free water to bring the total volume to 50 µL.
- Apply and Incubate: Apply the entire 50 µL DNase I mixture directly onto the center of the silica membrane in the collection tube.
- Digest: Incubate the column at room temperature for 15 minutes to allow the DNase I to degrade any contaminating DNA.
- Resume Protocol: Continue with the remaining steps of the isolation protocol, which typically include one or two additional wash steps to remove the DNase and any residual contaminants, followed by elution [3].
Workflow Diagram: Troubleshooting Path for RNA Purity
The following diagram outlines the logical decision-making process for diagnosing and resolving common RNA purity issues.
The Scientist's Toolkit: Essential Research Reagent Solutions
The following reagents are critical for successful RNA isolation and for troubleshooting purity issues.
Table 2: Essential Reagents for RNA Isolation and Purification Troubleshooting
| Reagent / Kit | Primary Function |
|---|---|
| PureLink RNA Mini Kit | A column-based method for isolating high-quality total RNA from most sample types; ideal for standard preparations [3]. |
| TRIzol Reagent | A phenol-guanidine based solution for lysis; highly effective for difficult samples (e.g., those high in nucleases or lipids) [3]. |
| PureLink DNase Set | Facilitates easy on-column digestion of DNA during RNA purification, removing gDNA contamination that can affect purity and downstream assays [3]. |
| RNaseZap RNase Decontamination Solution | Used to decontaminate surfaces, pipettors, and equipment to destroy RNases and prevent RNA degradation [3]. |
| THE RNA Storage Solution | An RNase-free, optimized buffer for resuspending and storing purified RNA; minimizes base hydrolysis [3]. |
| Sodium Acetate (3M, pH 5.2) | A salt used in ethanol precipitation protocols to facilitate the efficient precipitation of RNA and remove soluble contaminants [3]. |
| RNase-Free Water | DEPC-treated or otherwise certified RNase-free water, essential for all reagent preparation and sample dilution to prevent introduced degradation [69]. |
Troubleshooting Guides
FAQ: Addressing Common RNA Integrity Challenges
1. My RNA yields are consistently low. What is the most likely cause and how can I fix it?
Low RNA yield, provided the RNA is intact, typically points to insufficient homogenization or incomplete elution from purification columns [35]. For tissues preserved in RNAlater, homogenization can be more difficult, requiring optimized methods.
- Solution: Ensure complete tissue disruption by increasing homogenization time or using a more rigorous method. For column-based elution, incubate the nuclease-free water on the column membrane for 5-10 minutes at room temperature before centrifugation to improve elution efficiency [82]. A second elution can also be performed, though it will dilute the final sample.
2. How can I effectively remove genomic DNA contamination from my RNA preps?
Traces of genomic DNA can carry through in both phenol-based (e.g., TRIzol) and silica spin-filter methods, leading to false positives in downstream applications like RT-PCR [3] [35].
- Solution: The most effective and convenient method is to perform an on-column DNase digestion during the RNA isolation procedure [3] [82]. This is more efficient than post-isolation treatment and results in higher RNA recovery. For samples already purified, a dedicated DNase treatment kit can be used.
3. My RNA has low A260/230 and A260/280 ratios. What do these indicate?
Spectrophotometric ratios are key indicators of RNA purity.
- Low A260/280: Suggests protein contamination [82] [35]. This can occur if the purification column is overloaded or if homogenization was incomplete. Re-purifying the RNA with your chosen method can remove the residual protein.
- Low A260/230: Indicates carryover of guanidine salts or other inhibitors from the isolation process [82] [35]. These compounds can inhibit enzymatic reactions in downstream applications.
- Solution: Perform additional wash steps with 70-80% ethanol during silica column purification. If the problem persists after purification, an ethanol precipitation can help desalt the sample [35].
4. What is the single most critical step to prevent RNA degradation in fresh tissues?
The most critical step is the immediate inactivation of ubiquitous and stable RNases upon cell death or tissue harvesting [3] [52].
- Solution: You have three main options:
5. My RNA appears intact, but fails in RT-qPCR. What could be the cause?
Inhibitors carried over from the isolation process, such as guanidine salts, can be the culprit [35]. A low A260/230 ratio is a good indicator of this issue.
- Solution: Follow the solutions for low A260/230 above. Additionally, ensure you are not overloading the purification column, and always include a "-RT" control for each RNA sample to confirm that amplification is coming from RNA and not residual DNA [3].
Quantitative Comparison of RNA Preservation Methods
The choice of preservation method significantly impacts RNA yield, quality, and integrity. The following table summarizes a systematic comparison from a study on human dental pulp, a tissue known for high RNase activity [52].
Table 1: Performance Evaluation of RNA Preservation Methods in Dental Pulp Tissue
| Preservation Method | Average Yield (ng/μL) | Average RNA Integrity Number (RIN) | Key Advantages | Key Limitations |
|---|---|---|---|---|
| RNAlater Solution | 4,425.92 ± 2,299.78 | 6.0 ± 2.07 | Superior yield & integrity; non-toxic; ideal for clinical settings [52] | Tissue must be small for penetration; may complicate later homogenization [3] [35] |
| RNAiso Plus Reagent | -- | -- | Effective lysis and inactivation | Yield lower than RNAlater [52] |
| Snap Freezing (Liquid N₂) | 384.25 ± 160.82 | 3.34 ± 2.87 | Rapid inactivation of RNases [3] | Logistically challenging; yields and integrity highly variable; requires constant LN₂ supply [52] |
Optimizing RNA Quality in Cryopreserved Tissues
Archival tissues frozen without preservatives present a unique challenge. The following table synthesizes optimized protocols for handling such samples, based on a study using rabbit kidney tissue [27].
Table 2: Optimized Workflow for RNA Extraction from Unprotected Frozen Tissues
| Variable | Recommended Protocol | Experimental Rationale |
|---|---|---|
| Thawing Method | Small aliquots (≤100 mg): Thaw on ice.Large aliquots (250-300 mg): Thaw at -20°C. | Ice-thawing maintained RIN ≥7 for small pieces. For larger masses, thawing at -20°C provided significantly higher RIN than on ice (7.13 vs 5.25) [27]. |
| Preservative Addition | Add RNAlater during the thawing process. | RNAlater treatment during thawing resulted in significantly higher RNA integrity compared to no preservative, with 75% of samples achieving optimal quality (RIN ≥8) [27]. |
| Tissue Aliquot Size | ≤ 30 mg for direct processing. | Aliquots of 10-30 mg maintained a RIN ≥8 even after a 7-day processing delay at 4°C, making them ideal for most commercial kits [27]. |
| Freeze-Thaw Cycles | Minimize to 3 cycles or fewer. | RNA integrity (RIN) became notably more variable after 3–5 freeze-thaw cycles, especially in larger tissue aliquots [27]. |
Experimental Protocols
Detailed Methodology: Evaluating Fixation Protocols for Single-Cell Multiomics
This protocol is adapted from a study optimizing single-cell DNA-RNA sequencing (SDR-seq), which requires simultaneous profiling of genomic DNA and RNA from the same cell [83].
Objective: To compare the impact of different fixatives on the quality of RNA and DNA, ensuring compatibility with downstream single-cell sequencing.
Key Reagents:
- Cell Lines: Human induced pluripotent stem (iPS) cells (e.g., WTC-11) [83].
- Fixatives: Paraformaldehyde (PFA) and Glyoxal [83].
- Key Kits/Reagents: Custom in situ reverse transcription primers, Tapestri instrument (Mission Bio), multiplex PCR reagents [83].
Procedure:
- Cell Preparation: Dissociate cells into a single-cell suspension.
- Fixation: Aliquot cells and fix them using the two different protocols:
- PFA Fixation: Follow standard PFA cross-linking protocols.
- Glyoxal Fixation: Use a non-crosslinking glyoxal-based fixative protocol.
- Permeabilization: Permeabilize all fixed cells to allow reagent entry.
- In Situ Reverse Transcription (RT): Perform RT inside the fixed cells using custom primers containing poly(dT) for mRNA capture, along with Unique Molecular Identifiers (UMIs) and sample barcodes.
- Single-Cell Partitioning and Lysis: Load the cells onto the Tapestri platform to generate droplets. Cells are lysed within the first droplet.
- Multiplex PCR: A multiplexed PCR is performed in droplets to simultaneously amplify targeted genomic DNA loci and the cDNA generated from RNA.
- Library Preparation and Sequencing: Separate libraries for gDNA and RNA are prepared and sequenced.
Performance Assessment:
- RNA Quality: Assess the number of RNA targets detected, UMI counts per cell, and correlation of gene expression with bulk RNA-seq data. The study found that glyoxal fixation provided increased RNA target detection and UMI coverage compared to PFA [83].
- DNA Quality: Assess the uniformity of gDNA target coverage and the percentage of targets detected in the majority of cells. Both fixatives showed minimal differences in gDNA detection [83].
Workflow: Optimal Path for RNA Preservation and Isolation
The diagram below outlines a decision-making workflow to achieve high RNA integrity, integrating recommendations from multiple sources.
Diagram 1: Decision workflow for RNA preservation and isolation, guiding choices from sample collection to storage to maximize RNA integrity.
The Scientist's Toolkit: Key Research Reagent Solutions
Table 3: Essential Reagents for RNA Integrity Workflows
| Reagent / Kit | Primary Function | Application Context |
|---|---|---|
| RNAlater Stabilization Solution | Stabilizes and protects cellular RNA by inactivating RNases in intact, unfrozen tissues [3] [52]. | Ideal for clinical sampling; allows tissue storage at -20°C prior to homogenization. Superior for preserving yield and integrity in challenging tissues [52] [27]. |
| TRIzol / RNAiso Plus Reagents | Monophasic lysis reagents containing phenol and guanidine isothiocyanate for simultaneous disruption of cells and inactivation of RNases [52]. | Gold-standard for difficult-to-lyse tissues (e.g., high in lipids or nucleases). Effective for both fresh and frozen tissues [3] [27]. |
| PureLink RNA Mini Kit | Silica spin column-based system for rapid purification of total RNA, including a DNase set for on-column DNA digestion [3]. | Best and easiest method for most standard sample types. Enables efficient DNA removal without extra steps [3]. |
| RNaseZap Decontamination Solution | Effectively eliminates RNases from surfaces, pipettors, and glassware to prevent environmental contamination of samples [3]. | Critical for all pre- and post-isolation work to maintain RNA integrity. Should be used routinely on all work surfaces [3]. |
| Glyoxal Fixative | A non-crosslinking fixative that preserves RNA integrity better than crosslinking fixatives like PFA for complex downstream assays [84] [83]. | Optimal for single-cell multiomic protocols (e.g., SDR-seq) requiring simultaneous high-quality gDNA and RNA profiling [83]. |
Ensuring Data Integrity: Quality Control and Platform Selection for Your Goals
In the context of a broader thesis focused on solving RNA degradation in sample preparation research, ensuring RNA quality is a foundational step. The success of downstream applications—from quantitative PCR to next-generation sequencing—is entirely dependent on the integrity and purity of the starting RNA material. This guide details the three essential quality control (QC) metrics that every researcher should employ: spectrophotometry (A260/280), agarose gel electrophoresis, and the Bioanalyzer RNA Integrity Number (RIN). By systematically implementing these QC checks, scientists and drug development professionals can identify, troubleshoot, and prevent common issues that compromise RNA quality, thereby ensuring the reliability and reproducibility of their experimental data.
Critical RNA Quality Control Metrics
A comprehensive RNA QC strategy relies on three complementary techniques that assess different aspects of RNA quality. The following table summarizes their primary functions and key indicators.
Table 1: Overview of Essential RNA QC Techniques
| Technique | What It Measures | Key Indicators of High-Quality RNA | Common Output |
|---|---|---|---|
| Spectrophotometry (A260/280) | RNA concentration and purity from contaminants like proteins and salts [85]. | A260/280 ≈ 2.1 [85]; A260/230 ≈ 2.0-2.2 [86] [85]. | Numerical ratios (A260/280, A260/230) and concentration (ng/µL). |
| Agarose Gel Electrophoresis | RNA integrity and the presence of genomic DNA contamination [85]. | Sharp ribosomal RNA bands; 28S:18S intensity ratio of ~2:1 in eukaryotic samples [87] [85]. | Gel image showing rRNA banding pattern and potential smearing. |
| Bioanalyzer (RIN) | A standardized, quantitative assessment of RNA integrity [87] [85]. | RNA Integrity Number (RIN) ≥ 8 [87]. | Electropherogram trace and a single RIN score (1-10). |
Spectrophotometry (A260/280)
Ultraviolet (UV) spectrophotometry provides a rapid assessment of RNA concentration and purity from common contaminants.
- Quantity: RNA concentration is determined by measuring its absorbance at 260 nm (A260). An A260 of 1.0 is equivalent to 40 µg/mL of RNA [85].
- Purity: The ratios of absorbance at different wavelengths indicate contamination.
- A260/280 Ratio: This measures protein contamination. Pure RNA has a ratio of approximately 2.1. Ratios between 1.8 and 2.0 are often considered acceptable, though lower values suggest protein carryover [85].
- A260/230 Ratio: This measures contamination by organic compounds, such as guanidine salts or phenol. The ideal ratio is greater than 2.0, and values significantly lower than this range indicate the presence of contaminants [86] [85].
Agarose Gel Electrophoresis
This traditional method provides a visual snapshot of RNA integrity. By running RNA on a standard 1% agarose gel, you can observe the ribosomal RNA (rRNA) bands, which constitute the majority of cellular RNA [85].
- Intact RNA: In a high-quality eukaryotic RNA sample, you should observe two sharp, clear bands: the 28S rRNA band should be approximately twice as intense as the 18S rRNA band [87] [85].
- Degraded RNA: Degradation is indicated if the 28S and 18S bands are of equal intensity, show smearing, or if there is a significant smear below the 18S band [85].
- DNA Contamination: A discrete, high-molecular-weight band above the 28S rRNA indicates contamination with genomic DNA [85].
Bioanalyzer RNA Integrity Number (RIN)
The Agilent Bioanalyzer system uses microfluidics to provide an objective, quantitative measure of RNA integrity. It assigns an RNA Integrity Number (RIN) on a scale of 1 (completely degraded) to 10 (perfectly intact) [87] [85]. For sensitive downstream applications like RNA-Seq, an RIN ≥ 8 is generally required [87]. The RIN algorithm evaluates the entire electrophoretic trace of the RNA sample, not just the ribosomal peaks, providing a more reliable and standardized assessment than gel electrophoresis alone [87].
Troubleshooting Common RNA QC Problems
Despite best efforts, RNA preparations can sometimes fail QC. Below is a structured FAQ to help diagnose and solve the most common problems.
Q1: My RNA has a low A260/280 ratio (<1.8). What does this mean, and how can I fix it?
- Cause: A low A260/280 ratio typically indicates protein contamination [35] [85]. This can happen if the sample was overloaded, homogenization was incomplete, or the protein removal steps were inefficient [35].
- Solutions:
- Clean up the sample: Subject the RNA to an additional purification round using your standard method (e.g., a silica spin column or phenol:chloroform extraction) [35].
- Improve homogenization: Ensure tissue or cells are completely and thoroughly homogenized to efficiently release RNA and denature proteins [86] [35].
- Verify protocol: For column-based kits, ensure the Proteinase K digestion step was utilized for the recommended time [86].
Q2: My RNA has a low A260/230 ratio (<1.5). What contaminants are present, and how do I remove them?
- Cause: A low A260/230 ratio signals carryover of organic compounds such as guanidine salts (from lysis buffers) or phenol [86] [35].
- Solutions:
- Extra washes: Perform additional wash steps with 70-80% ethanol when using silica columns [35]. Ensure the tip of the column does not contact the flow-through after the final wash [86].
- Ethanol precipitation: For samples already purified, an ethanol precipitation can effectively desalt the RNA [35].
- Centrifuge longer: After the final wash, spin the column for an additional 2 minutes to remove residual wash buffer [86].
Q3: My agarose gel shows the 28S and 18S bands are smeared and/or the 28S band is not twice as intense as the 18S. What went wrong?
- Cause: This is a classic sign of RNA degradation. Degradation can occur during sample collection (if not immediately frozen or preserved), storage, the extraction process itself, or post-isolation due to RNase contamination [88] [35] [85].
- Solutions:
- Prevent RNases: Wear gloves, use RNase-free tips, tubes, and solutions, and work in a dedicated clean area [88]. Add beta-mercaptoethanol (BME) to the lysis buffer to inactivate RNases [35].
- Proper sample storage: Store input samples at -80°C and avoid repeated freeze-thaw cycles [86] [88]. Use RNA stabilization reagents (e.g., RNAlater) for tissues [86] [53].
- Optimize homogenization: Homogenize quickly and thoroughly in the presence of a denaturing lysis buffer, but avoid overheating by using short, pulsed bursts [35].
Q4: My agarose gel shows a high molecular weight band above the 28S rRNA. What is it, and how do I get rid of it?
- Cause: The high molecular weight band is genomic DNA (gDNA) contamination [85].
- Solutions:
- DNase I treatment: The most effective solution is to include an on-column DNase I digestion step during RNA purification [86] [53]. Alternatively, an in-solution (off-column) DNase treatment can be performed after elution [86].
- Improve homogenization: Insufficient shearing of genomic DNA during homogenization can lead to increased carryover. Ensure your homogenization method is robust [35].
Q5: I have a good RNA yield and purity, but my RIN value is low (<7). Why?
- Cause: The RNA is degraded, but the degradation may not have been obvious from spectrophotometry alone. The RIN is a more sensitive measure of integrity. The causes are the same as in Q3.
- Solutions:
- Focus on the solutions listed for Q3, paying particular attention to the speed of sample processing after collection and the temperature during extraction (working at 4°C can help maintain integrity) [87].
- Ensure all equipment and reagents for electrophoresis (e.g., gel tanks, water) are treated to remove RNases if using a gel-based method for QC [87].
Research Reagent Solutions
The following table lists key reagents and materials essential for successful RNA extraction and quality control.
Table 2: Essential Reagents for RNA Work
| Reagent/Material | Function | Example/Note |
|---|---|---|
| Guanidine Thiocyanate | A powerful chaotropic salt that denatures proteins and inactivates RNases [35]. | Core component of lysis buffers in kits like QIAGEN RNeasy and reagents like TRIzol [53]. |
| DNase I | Enzyme that digests and removes contaminating genomic DNA [86]. | Can be used on-column during purification or in-tube after elution [86]. |
| Beta-Mercaptoethanol (BME) | A reducing agent that helps denature proteins and inactivate RNases by breaking disulfide bonds [35]. | Often added to lysis buffers fresh before use (e.g., 10 µL per 1 mL of buffer) [35]. |
| RNA Stabilization Reagent | Protects RNA integrity in tissues and cells between collection and processing [86] [53]. | Reagents like RNAlater or Monarch DNA/RNA Protection Reagent [86] [53]. |
| Silica Spin Column | Binds RNA in the presence of high-salt buffers, allowing for purification and washing away of contaminants [86]. | Used in many commercial mini-prep kits [86]. |
| Acidic Phenol (TRIzol) | Used in liquid-liquid extraction to separate RNA into the aqueous phase, while DNA and proteins are in the interphase and organic phase [53] [35]. | pH is critical; acidic conditions ensure DNA partitions away from the RNA [35]. |
| Nuclease-Free Water | Used to elute or resuspend purified RNA; guaranteed to be free of nucleases that would degrade the sample [86] [35]. | Essential for diluting RNA and preparing solutions for downstream applications [86]. |
RNA QC Workflow and Decision Pathway
The following diagram illustrates a logical workflow for performing RNA quality control and the subsequent decision-making process based on the results. This integrated approach is critical for preventing the analysis of degraded or contaminated samples.
RNA Quality Control Workflow
The success of sophisticated downstream applications like RNA-Seq, qRT-PCR, and biomarker assays is fundamentally dependent on the quality of the starting RNA material. Within the broader thesis of solving RNA degradation in sample preparation, this guide serves as a technical support center, providing targeted troubleshooting and best practices to ensure RNA integrity throughout your experimental workflow. Proper validation of RNA quantity, purity, and integrity is not merely a preliminary step but a critical determinant of data reliability, especially in drug development and clinical research where outcomes inform critical decisions [89].
Fundamental Principles of RNA Quality Control
Key Metrics and Assessment Methods
Before proceeding to any application, you must validate your RNA sample using three key parameters: quantity, purity, and integrity.
- Quantity: Concentration is accurately measured using fluorometric methods (e.g., Qubit with dyes like RiboGreen) rather than UV spectroscopy alone, as fluorometry is more specific for nucleic acids and less sensitive to contaminants [90] [89].
- Purity: Assessed by UV spectrophotometry. The A260/A280 and A260/230 ratios indicate contamination from proteins or solvents. Acceptable ranges are approximately 1.8–2.0 for A260/A280 and >1.8 for A260/230 [90] [89]. Low A260/280 suggests protein contamination, while low A260/230 indicates residual salts or guanidine [91].
- Integrity: The most critical metric, assessed via electrophoretic methods. The Agilent 2100 Bioanalyzer provides an RNA Integrity Number (RIN), a score from 1 (degraded) to 10 (intact) [89]. Traditional agarose gel electrophoresis can also show the distinct 28S and 18S ribosomal RNA bands, where a 2:1 ratio indicates good integrity [89].
The Scientist's Toolkit: Essential Reagents and Kits
The table below summarizes key reagents and materials crucial for maintaining RNA quality.
Table 1: Research Reagent Solutions for RNA Work
| Item | Function | Example Use Cases |
|---|---|---|
| DNA/RNA Protection Reagent (e.g., Monarch DNA/RNA Protection Reagent) | Maintains RNA integrity during sample storage by inhibiting nucleases [91]. | Stabilizing cell pellets or tissues before freezing at -80°C [91]. |
| Stabilization Solution (e.g., RNALater) | Permeates tissues to stabilize and protect RNA at harvesting [27]. | Immersion of fresh tissue samples prior to freezing or processing. |
| Chaotropic Lysis Buffer (e.g., TRIzol, RNA Lysis Buffer) | Disrupts cells, inactivates RNases, and separates RNA from other macromolecules [88] [27]. | Initial step in total RNA extraction from cells or homogenized tissues. |
| DNase I, RNase-free | Digests and removes contaminating genomic DNA [91] [92]. | On-column or in-solution treatment during purification to prevent false positives in qRT-PCR. |
| Magnetic Beads or Silica Columns | Bind RNA specifically for purification from contaminants after lysis [91] [93]. | Most common method in commercial mini-prep kits for high-purity RNA elution. |
| Nuclease-free Water | Safe resuspension of RNA pellets without introducing degradation [91]. | Final elution of purified RNA for use in downstream applications. |
Troubleshooting Common RNA Extraction and Quality Issues
Frequently Asked Questions (FAQs)
Q1: My RNA yield is consistently low. What are the most common causes and solutions?
- Cause: Incomplete Homogenization. Tissues or cells are not fully disrupted, preventing RNA release.
- Solution: Increase homogenization or digestion time. For tissues, ensure thorough powdering under liquid nitrogen or use a sufficient volume of lysis buffer [91] [88].
- Cause: Overloaded Column. Too much starting material can clog the purification column and reduce binding capacity.
- Solution: Reduce the amount of starting material to match the kit's specifications [91].
- Cause: Incomplete Elution. RNA may not be fully dissolving off the column matrix.
- Solution: After adding nuclease-free water, incubate the column at room temperature for 5-10 minutes before centrifugation. A second elution can also recover residual RNA (though it will dilute the sample) [91].
Q2: My RNA appears degraded. How can I prevent this?
- Cause: RNase Contamination. Introduced via contaminated surfaces, pipettes, or reagents.
- Solution: Always use RNase-free consumables, filter tips, and dedicated work areas. Wear gloves and a mask [88].
- Cause: Improper Sample Handling. Tissues were not stabilized immediately after collection or were subjected to multiple freeze-thaw cycles.
- Solution: Flash-freeze samples in liquid nitrogen or use a stabilization reagent like RNALater immediately upon collection. Store samples at -80°C and avoid repeated freeze-thaw cycles by creating single-use aliquots [91] [88] [27].
Q3: My spectrophotometry shows poor purity ratios (A260/280 and A260/230). What does this mean?
- Low A260/280 (<1.8): Typically indicates residual protein contamination. Ensure complete removal of the organic phase during TRIzol extraction or use a Proteinase K digestion step if your protocol includes it [91] [89].
- Low A260/230 (<1.8): Suggests carryover of salts, guanidine, or ethanol from wash buffers. Ensure you are not disturbing the pellet during ethanol washes and that the final wash is thoroughly removed. Centrifuge the column for an additional 2 minutes after the final wash and blot the rim of the collection tube on a clean Kimwipe to remove residual buffer [91].
Q4: I have genomic DNA contamination in my RNA prep. How do I remove it?
- Solution: Perform an on-column DNase I digestion during the RNA purification process. For stubborn contamination, a more rigorous in-tube (off-column) DNase I treatment after elution can be effective [91] [92].
Sample Handling and Preservation Workflow
The following diagram illustrates the critical steps and decision points for handling samples to maximize RNA integrity, from collection to storage.
Application-Specific RNA Quality Requirements
Quality Thresholds for Key Techniques
Different downstream applications have varying tolerances for RNA quality. The table below summarizes the recommended quality metrics for reliable results.
Table 2: RNA Quality Requirements for Downstream Applications
| Application | Recommended Integrity | Recommended Purity (A260/280) | Key Considerations |
|---|---|---|---|
| RNA Sequencing (RNA-seq) | RIN > 8 [90] | ~2.0 | High integrity is non-negotiable for accurate transcript representation and assembly. Low RIN causes 3' bias [92]. |
| qRT-PCR / RT-qPCR | RIN ≥ 7 is often acceptable; optimal for long amplicons: RIN > 8 [89] | ~2.0 | For short amplicons (<100 bp), partially degraded RNA may still yield results. Always validate with no-RT controls to check for gDNA contamination [94]. |
| Microarray Analysis | RIN ≥ 8 [92] [89] | ~2.0 | Similar to RNA-seq, requires high-quality RNA to avoid biased hybridization and background noise. |
| Biomarker Assays | Dependent on the specific assay, but RIN ≥ 7 is a common minimum [94] | ~2.0 | Consistency in RNA quality across all patient samples is critical to avoid introducing technical artifacts that could be misinterpreted as biomarkers. |
Impact of RNA Quality on Downstream Data Integrity
The following diagram outlines how RNA quality issues propagate through the workflow of major applications, leading to specific data artifacts.
Protocols for Validated RNA Extraction from Challenging Samples
Optimized Protocol for Cryopreserved Tissues Without Preservatives
A common challenge is working with archival frozen tissues that were stored without RNA stabilizers. The following validated protocol is adapted from a 2025 study [27].
Objective: To extract high-integrity RNA from frozen tissues originally stored without preservatives. Materials: Pre-cooled mortar and pestle, Liquid nitrogen (LN), RNALater stabilization solution, RNase-free tubes, scissors, and forceps. A compatible RNA extraction kit (e.g., Hipure Total RNA Mini Kit).
Cryogenic Smashing:
- Fill a mortar with liquid nitrogen to pre-cool.
- Transfer the frozen tissue block into the mortar and gently smash it into a fine powder using the pestle, adding more LN as needed to keep the tissue frozen.
Preservative Application & Thawing:
- Aliquot an appropriate volume of RNALater (e.g., 750 µL for a 10-30 mg aliquot) into an RNase-free tube.
- Weigh the smashed tissue powder and quickly transfer it into the tube containing RNALater.
- Critical Thawing Step: Incubate the tube on ice for 45 minutes to allow the tissue to thaw and the preservative to penetrate. For larger tissue aliquots (100-300 mg), thawing at -20°C overnight is recommended [27].
RNA Extraction:
- Proceed with your chosen column-based RNA extraction kit according to the manufacturer's instructions, using the thawed tissue/RNALater mixture as the starting input.
- Include the optional on-column DNase I digestion step to remove genomic DNA contamination [91].
Quality Control:
- Quantify the extracted RNA using a fluorometer.
- Assess integrity by calculating the RIN value on the Agilent Bioanalyzer.
Troubleshooting Note: This method was validated to maintain RIN ≥ 8 in small (≤ 30 mg) rabbit and murine kidney tissues. Human tissues may show marginally reduced RIN (around 7.8) but are still of high quality for many applications [27].
Preventing RNA degradation requires a proactive and vigilant approach at every stage of experimentation. The most advanced downstream analysis cannot compensate for poor-quality starting material. The core principles for success include: the immediate stabilization of samples upon collection, the use of nuclease-free reagents and consumables, rigorous adherence to purification protocols with a focus on removing contaminants and DNA, and comprehensive quality control using both spectrophotometric and integrity-based metrics (RIN). By integrating the troubleshooting guides, FAQs, and validated protocols provided in this technical support center, researchers can significantly enhance the reliability and reproducibility of their gene expression data in RNA-Seq, qRT-PCR, and biomarker assay development.
Troubleshooting Guides
Problem: My RNA yield is too low. What could be the cause?
Answer: Low RNA yield can result from several steps in the purification process. The table below outlines common causes and their solutions.
| Cause | Solution |
|---|---|
| Incomplete sample disruption | Increase homogenization time; centrifuge after digestion to pellet debris; use larger volumes of lysis buffer [95]. |
| Overloaded column | Reduce the amount of starting material to match the kit's specifications [95]. |
| Incomplete elution | Incubate the column with nuclease-free water for 5-10 minutes at room temperature before centrifugation; perform a second elution (note: this dilutes the sample) [95]. |
| RNA degradation due to improper storage | Store input samples at -80°C prior to use; use DNA/RNA protection reagents to maintain RNA integrity during storage [95] [3]. |
| Reagents added incorrectly | Verify the protocol for correct buffer reconstitution and order of addition for buffers and ethanol [96]. |
Problem: My purified RNA is degraded. How do I prevent this?
Answer: RNA degradation is often due to ribonuclease (RNase) activity or improper handling. Follow these best practices to preserve RNA integrity.
| Cause | Solution |
|---|---|
| RNase contamination | Use a dedicated, clean workspace; decontaminate surfaces with RNase-deactivating reagents; wear gloves and use RNase-free tips and tubes [95] [2]. |
| Improper sample storage | Use purified RNA immediately or store it at -70°C to -80°C in single-use aliquots to avoid repeated freeze-thaw cycles [3] [96] [2]. |
| Sample not stabilized after collection | Inactivate endogenous RNases immediately upon cell or tissue harvesting by homogenizing in a chaotropic lysis buffer, flash-freezing in liquid nitrogen, or placing samples in a stabilization reagent like RNAlater [3] [2]. |
Problem: My RNA has genomic DNA contamination. How can I remove it?
Answer: DNA contamination can interfere with sensitive downstream applications like qRT-PCR.
| Cause | Solution |
|---|---|
| gDNA not removed by column | Perform an optional on-column DNase I treatment during the RNA isolation protocol. This is often more efficient and yields higher RNA recovery than off-column treatments [95] [3]. |
| Too much starting material | Ensure the amount of input material is within the kit's specifications to prevent column overloading [95]. |
| Residual DNA after purification | For applications requiring complete DNA removal, perform an in-tube/off-column DNase I treatment on the purified RNA, followed by a cleanup step [95]. |
Problem: The spectrophotometric readings for my RNA are poor (low A260/A280 or A260/A230 ratios).
Answer: Abnormal OD ratios indicate the presence of contaminants that can inhibit enzymatic reactions.
| Cause | Solution |
|---|---|
| Low A260/A280 (protein contamination) | Ensure the Proteinase K digestion step was utilized for the recommended time. Confirm that samples have no debris before loading onto the purification column [95]. |
| Low A260/A230 (guanidine salt carryover) | Ensure all wash steps are performed. After the final wash, centrifuge the column for an additional 2 minutes to ensure no residual ethanol or salt remains. When reusing collection tubes, blot the rim on a clean wipe to remove residual buffer [95] [96]. |
| Unusual readings (low concentration) | Elute with a smaller volume of nuclease-free water (e.g., 30 µl). Ensure the RNA concentration is within the optimal range for your spectrophotometer [95]. |
Frequently Asked Questions (FAQs)
How do I choose the right RNA isolation kit for my sample type?
The optimal kit depends on your sample's characteristics and downstream goals. This decision matrix outlines the best-fit uses for kits from leading vendors.
Supporting Details:
- For most standard sample types (e.g., mammalian cells, liver tissue), column-based kits like the Thermo Fisher PureLink RNA Mini Kit are recommended for their ease of use and high-quality yield [3].
- For difficult tissues that are high in endogenous RNases (e.g., pancreas) or lipid content (e.g., brain, adipose), a more rigorous, phenol-based method like TRIzol Reagent is superior [3].
- For very low input samples or single-cell RNA-seq, specialized kits like the Takara SMART-Seq v4 Ultra Low Input RNA Kit are designed to work efficiently with picogram to nanogram amounts of RNA [97].
- For high-throughput or automated workflows, magnetic bead-based kits such as the Thermo Fisher MagMAX mirVana Total RNA Isolation Kit are ideal as they are easy to automate on magnetic particle handlers [3].
What are the best practices for handling and storing samples to prevent RNA degradation?
Answer: RNA integrity begins the moment a sample is collected. A proactive workflow from collection to storage is crucial to prevent degradation.
Key Considerations:
- Immediate Stabilization: Upon sample collection, immediately homogenize in a chaotropic lysis buffer (e.g., guanidinium-based), flash-freeze in liquid nitrogen, or immerse in a stabilization solution like RNAlater or RNAprotect to inactivate ubiquitous RNases [3] [2].
- RNase-free Environment: Designate a clean workspace, decontaminate surfaces with reagents like RNaseZap, wear gloves, and use RNase-free plasticware and solutions [3] [2].
- Temperature Control: Keep samples on ice whenever possible and avoid repeated freeze-thaw cycles. For long-term storage, keep purified RNA at -80°C [3] [2].
When is DNase treatment necessary, and which method is best?
Answer: DNase treatment is crucial for applications highly sensitive to DNA contamination, such as:
- qRT-PCR with primers that do not span an intron-exon junction.
- Working with samples from organisms with very small or no introns [3].
The most effective and convenient method is on-column DNase digestion (e.g., using the PureLink DNase Set). This approach treats the RNA while it is bound to the purification column, leading to higher RNA recovery and easier handling compared to post-purification (in-solution) treatment [3].
How should I measure the quality and quantity of my purified RNA?
Answer: Use a combination of methods for a complete assessment.
| Method | What It Measures | Ideal Output/Notes |
|---|---|---|
| UV Spectrophotometry (e.g., NanoDrop) | Concentration and purity (A260/A280 and A260/A230 ratios). | A260/A280: 1.8 - 2.0 [3]. A260/A230: >2.0 [95]. |
| Fluorometry (e.g., Qubit) | Accurate RNA quantity using RNA-specific dyes; less affected by contaminants. | Ideal for low-concentration samples or when contaminants are suspected [3]. |
| Capillary Electrophoresis (e.g., Bioanalyzer) | RNA integrity (RIN) and assesses the presence of degraded RNA or DNA contamination. | RNA Integrity Number (RIN) ≥ 7 is generally acceptable for most applications [3]. |
The Scientist's Toolkit: Key Research Reagent Solutions
This table details essential reagents and materials used in RNA sample preparation to ensure success.
| Item | Function | Example Products/Categories |
|---|---|---|
| Chaotropic Lysis Buffers | Denature proteins and inactivate RNases upon sample homogenization, protecting RNA integrity. | Guanidinium isothiocyanate or guanidinium hydrochloride-based buffers [3] [98]. |
| RNA Stabilization Reagents | Preserve RNA in intact tissues and cells at the point of collection, preventing degradation before processing. | RNAlater Tissue Collection Solution, RNAprotect, PAXgene tubes for blood [3] [2]. |
| RNase Decontamination Solutions | Eliminate RNases from work surfaces, equipment, and instrumentation to prevent introduction of contaminants. | RNaseZap RNase Decontamination Solution or Wipes [3]. |
| DNase I Kit | Enzymatically digest residual genomic DNA that may co-purify with RNA, preventing false positives in PCR. | PureLink DNase Set, On-column DNase I digests [95] [3]. |
| Magnetic Bead-Based Kits | Enable high-throughput and automated RNA purification, reducing hands-on time and improving reproducibility. | MagMAX mirVana Total RNA Isolation Kit [3]. |
| Solid-Phase Extraction Columns | Silica-membrane columns that selectively bind RNA for efficient washing and elution; the core of most mini-prep kits. | Found in kits like Monarch Total RNA Miniprep Kit (NEB) and PureLink RNA Mini Kit (Thermo Fisher) [95] [3]. |
This technical support center provides targeted troubleshooting guides and FAQs to help researchers overcome the critical challenge of RNA degradation in sample preparation. The resources below are structured to address specific experimental issues within the broader context of applying emerging technologies for robust RNA analysis.
Frequently Asked Questions (FAQs)
What are the primary causes of RNA degradation during sample preparation, and how can they be prevented? RNA degradation primarily occurs due to ribonuclease (RNase) contamination and improper sample handling. Prevention requires a multi-pronged approach: using RNase-free consumables and water, decontaminating work surfaces and equipment with RNase-inactivating solutions like RNaseZAP, and stabilizing samples immediately upon collection using reagents like DNA/RNA Shield [99] [100]. Always wear gloves and use certified RNase-free plasticware [99].
How does RNA degradation impact downstream next-generation sequencing (NGS) applications? Using degraded RNA in mRNA-seq workflows causes significant technical biases, including:
- 3' Bias: The 5' end of transcripts is lost, leading to mis-identification or complete loss of information about splice variants [6].
- Reduced Alignment Efficiency: This results in a lower percentage of sequence reads that can be mapped to the reference genome [6].
- Skewed Gene Expression Data: Degradation rates can vary by transcript, causing unexpected gene expression variation and biased results, with RPKM values positively correlating with RNA Integrity Number (RIN) [6]. Illumina recommends a RIN of at least 8 for their mRNA-seq workflows [6].
My Bioanalyzer results show a degraded RNA ladder. Is the problem with my samples or my equipment? It could be either. First, confirm if your RNA ladder and samples were degraded prior to loading by checking their quality with an alternative method [99]. If they were intact, the degradation likely occurred during chip preparation due to RNase contamination. To resolve this, use a new electrode cleaner chip, decontaminate the electrode cartridge, use a new box of RNase-free pipette tips, and decontaminate your lab bench and pipettes with RNaseZAP or an equivalent [99].
What are the key advantages of using microfluidics for RNA analysis and detection? Microfluidic platforms offer several key advantages for RNA analysis and detection, including:
- High Sensitivity and Specificity: They enable the creation of highly sensitive biosensors for detecting low-abundance RNA biomarkers, such as circular RNAs (circRNAs) in cancer diagnosis [101].
- Rapid, Integrated Analysis: These systems integrate multiple steps like sample preparation, isothermal amplification (e.g., catalytic hairpin assembly - CHA), and electrochemical detection into a single, portable device, significantly reducing assay time and contamination risk [101].
- Automation and Reproducibility: Microfluidic systems provide precise fluid control and automation, leading to high uniformity and reproducibility in processes like lipid nanoparticle (LNP) synthesis for RNA delivery [102].
Troubleshooting Guide
The following table outlines common problems, their potential causes, and recommended solutions to prevent and manage RNA degradation.
| Problem | Possible Cause | Recommended Solution |
|---|---|---|
| Low/No RNA yield | Incomplete sample lysis; RNA degradation post-collection | Implement mechanical (bead beating) or enzymatic (proteinase K) lysis steps; Stabilize samples immediately in lysis buffer or DNA/RNA Shield at collection [100] |
| Poor RNA Integrity (Low RIN/RQI) | RNase contamination; Improper sample storage or freeze-thaw cycles | Decontaminate workspaces and equipment with RNaseZAP [99]; Minimize freeze-thaw cycles by creating single-use aliquots [103]; Use nuclease-free water and certified reagents [103] |
| DNA contamination | Inefficient DNA removal during RNA extraction | Perform on-column DNase I digestion during purification [100]; Visually inspect RNA on a gel or bioanalyzer for high molecular weight DNA fragments [100] |
| 3' Bias in RNA-seq Data | Input RNA is degraded | Assess RNA quality with a system like Agilent Bioanalyzer or TapeStation; Use only high-integrity RNA (RIN ≥ 8) for mRNA-seq [6] |
| Low cDNA yield in RT-(q)PCR | Degraded RNA template; Reverse transcriptase inhibitors | Check RNA integrity prior to cDNA synthesis [103]; Re-purify RNA to remove inhibitors like salts or heparin [103]; Use a robust, thermostable reverse transcriptase [103] |
Experimental Workflow for RNA Quality Control
The following workflow is essential for qualifying your samples and ensuring reliable downstream results, especially when working with new sample types or preparation protocols.
The Scientist's Toolkit: Research Reagent Solutions
This table details key reagents and kits essential for successful RNA analysis, particularly in the context of stabilizing and analyzing RNA.
| Item | Function | Example Use Case |
|---|---|---|
| DNA/RNA Shield | Stabilization reagent that inactivates nucleases, allowing samples to be stored at ambient temperature post-collection [100]. | Field sample collection; stabilization of precious clinical biopsies [100]. |
| Quick-RNA Kits | A family of kits designed for efficient RNA extraction from specific sample types (e.g., whole blood, plant, fungal/bacterial) with integrated DNase treatment [100]. | Rapid purification of high-quality, DNA-free RNA from diverse biological sources [100]. |
| Agilent Bioanalyzer RNA Kits | Microfluidic-based automated electrophoresis kits (e.g., RNA 6000 Nano/Pico) for assessing RNA integrity, concentration, and sample purity [99]. | Determining RNA Integrity Number (RIN) prior to sensitive downstream applications like RNA-seq [99] [6]. |
| RNaseZAP | A solution used to decontaminate surfaces and equipment by effectively inactivating RNases [99]. | Routine cleaning of lab benches, pipettes, and electrode cartridges for Bioanalyzer systems [99]. |
| Microfluidic Electroporation Device | A platform that uses electric fields in microscale channels to transiently open cell membranes for efficient intracellular nucleic acid delivery, minimizing cytotoxicity [102]. | Ex vivo cell therapy research, such as non-viral transfection for CRISPR-Cas9 gene editing [102]. |
| Catalytic Hairpin Assembly (CHA) Reagents | Components for an enzyme-free, isothermal amplification reaction used in some microfluidic biosensors for highly sensitive RNA detection [101]. | Ultrasensitive detection of low-abundance RNA biomarkers, such as circular RNAs for cancer diagnosis [101]. |
Advanced Technology Spotlight: Microfluidic circRNA Detection
Emerging platforms combine microfluidics with machine learning to achieve highly sensitive diagnostics. The diagram below illustrates an integrated microfluidic electrochemical biosensor for detecting stable circular RNA (circRNA) biomarkers.
FAQs: RNA Quality in Research & Development
FAQ 1: Why is RNA quality so critical for drug development and precision medicine? High-quality RNA is fundamental because its integrity directly determines the accuracy and reliability of the data used to make key decisions in the drug development pipeline. In precision medicine, analyses like RNA sequencing are used to understand a patient's specific disease profile. If the RNA is degraded, the resulting data will not accurately reflect the biological reality of the sample. This can lead to incorrect conclusions about which genes are expressed, potentially causing researchers to pursue the wrong therapeutic targets or misclassify a patient's condition. High-quality RNA ensures that the molecular insights you obtain are a true representation of the biological state you are studying [104].
FAQ 2: How is RNA integrity measured, and what are the acceptable thresholds? RNA integrity is most commonly measured using metrics like the RNA Integrity Number (RIN), RNA Quality Number (RQN), and Transcript Integrity Number (TIN). These are calculated by instruments such as the Agilent Bioanalyzer and provide a numerical score of RNA degradation.
- RQN/RIN Interpretation: Values range from 10 (perfectly intact) to 1 (completely degraded). For most downstream applications like next-generation sequencing, a minimum RIN value of 7 is often recommended. However, some techniques like qRT-PCR can tolerate samples with RIN values as low as 2 [3].
- A260/A280 Ratio: This UV spectroscopy measurement indicates protein contamination. An acceptable ratio for pure RNA is 1.8-2.0 [3].
FAQ 3: My clinical samples are from severely ill patients. Should I automatically exclude samples with low RNA integrity? Not necessarily. A 2025 observational study on necrotising soft tissue infections (NSTIs) found that in infected tissue samples, RNA integrity (as measured by RQN) was actually positively associated with disease severity (higher SOFA score). This suggests that discarding samples based solely on low integrity metrics could introduce a systematic bias into your study by removing the most severe cases. Instead of automatic exclusion, the study recommends using RNA integrity measures as covariates in your statistical models to account for their potential influence on the data [105] [106].
FAQ 4: What are the major challenges in developing RNA-targeting therapeutics? While a promising field, RNA-targeted drug discovery faces several hurdles:
- Structural Complexity: RNA is highly flexible and has a strong negative charge, making it difficult for small molecules to bind effectively [107] [108].
- Delivery Issues: Getting RNA-based therapeutics (like siRNA or mRNA) to the right cells in the body remains a major obstacle. Many clinical trials fail due to inefficient tissue targeting, insufficient selectivity, and severe side effects [109].
- Specificity: Achieving high target specificity for small molecules to avoid off-target effects is challenging [107].
Troubleshooting Guide: Preventing RNA Degradation
Problem: Inconsistent RNA Quality from Tissue Samples
Potential Causes and Solutions:
- Cause 1: Slow inactivation of endogenous RNases after tissue harvesting.
- Solution: Homogenize samples immediately in a chaotropic lysis buffer (e.g., guanidinium-based buffer like TRIzol) or flash-freeze in liquid nitrogen. For tissue pieces, use an RNA stabilization solution like RNAlater to preserve RNA at collection [3].
- Cause 2: Improper storage temperature and time before RNA extraction.
- Solution: Store tissues at temperatures below 4°C. A 2025 study on cardiac tissue showed RNA degrades faster at 22°C than at 4°C. While global gene expression profiles were stable for up to 24 hours, storage beyond seven days induced widespread changes. If prolonged storage is unavoidable, include RIN as a covariate in downstream analyses [110].
- Cause 3: Introduction of environmental RNases during handling.
- Solution: Use RNase-free tips, tubes, and solutions. Decontaminate surfaces (pipettors, benchtops) with a specialized solution like RNaseZap, and change gloves frequently [3].
Problem: Low RNA Yield or Purity
Potential Causes and Solutions:
- Cause: Overloading or underloading the RNA isolation column, or using an inefficient isolation method for the tissue type.
- Solution:
- For most sample types, use column-based kits (e.g., PureLink RNA Mini Kit).
- For difficult tissues high in nucleases (e.g., pancreas) or fat (e.g., brain), use a more rigorous, phenol-based method like TRIzol Reagent [3].
- To remove genomic DNA contamination, perform an "on-column" DNase digestion during the purification protocol, which is more efficient than post-purification treatment [3].
- Solution:
Table 1: Association Between Clinical Severity and RNA Integrity in NSTI Patients
| Sample Type | Disease Severity Metric | Impact on RQN | Impact on TIN | Statistical Significance (p-value) |
|---|---|---|---|---|
| Infected Tissue | SOFA Score (per 5-point increase) | Increased by 0.19 points | No significant influence | 0.022 [106] |
| Whole Blood | SOFA Score | No association | No association | Not Significant [105] |
| Whole Blood | Plasma Lactate Level | No association | No association | Not Significant [3] |
Table 2: Effect of Storage Conditions on RNA Integrity in Cardiac Tissue
| Storage Temperature | Storage Time | Observed Effect on RNA | Recommended Action |
|---|---|---|---|
| 4°C | Up to 24 hours | Relatively stable gene expression profiles | Acceptable for storage [110] |
| 22°C (Room Temp) | Up to 24 hours | Increased degradation compared to 4°C | Minimize storage time at this temperature [110] |
| 4°C or 22°C | > 7 days | Widespread changes in gene expression profiles | Avoid; if unavoidable, use RIN as covariate [110] |
Experimental Protocol: Validating RNA Integrity in a Clinical Cohort
This protocol is adapted from a 2025 study investigating RNA integrity in necrotising soft tissue infections [105] [106].
Objective: To systematically collect and process clinical tissue and blood samples for RNA analysis, while evaluating the impact of pre-analytical variables on RNA quality.
Materials:
- RNase-free collection tubes (e.g., PAXgene Blood RNA tubes for blood)
- RNAlater or similar RNA stabilization solution
- Equipment for tissue homogenization (e.g., TissueLyser II)
- RNA extraction kit suitable for fibrous tissue and blood (e.g., RNeasy Fibrous Tissue Mini Kit)
- Agilent 2100 Bioanalyzer or similar system for RIN/RQN calculation
- Software for TIN calculation
Methodology:
- Sample Collection:
- Collect infected tissue samples during surgical debridement. Divide tissue into small pieces (~0.5 cm) to allow rapid penetration of stabilizer [3].
- Immediately place one piece in RNAlater and another in a sterile tube for potential fresh freezing.
- Collect whole blood samples in RNA stabilization tubes.
- RNA Extraction & Quality Assessment:
- Homogenize tissue samples using a validated method (e.g., 2 x 2 min at 20 Hz in a TissueLyser) in a chaotropic lysis buffer [110].
- Extract total RNA following the manufacturer's protocol for your kit, including an on-column DNase digestion step to remove genomic DNA.
- Quantify RNA concentration and purity using a spectrophotometer (e.g., NanoDrop). Acceptable A260/A280 ratio is 1.8-2.0 [3].
- Assess RNA integrity using the Bioanalyzer to obtain RIN/RQN values.
- Calculate the Transcript Integrity Number (TIN) from RNA-seq data alignment files to get a sequencing-based integrity metric [105].
- Data Analysis:
- Do not discard samples based on low RQN/RIN alone.
- Use linear models to examine the relationship between RNA integrity measures (RQN, TIN) and clinical variables such as SOFA score and lactate levels.
- In differential expression analysis, include RQN and/or TIN as covariates to control for the influence of RNA integrity on the results [105] [106].
The Scientist's Toolkit: Essential Reagents for RNA Integrity
Table 3: Key Reagent Solutions for RNA Isolation and Quality Control
| Reagent / Kit | Primary Function | Specific Use Case |
|---|---|---|
| RNAlater Stabilization Solution | Stabilizes and protects cellular RNA in intact, unfrozen tissue and cell samples. | Ideal for field work or clinical settings where immediate freezing is not possible. Ensures tissue pieces are small (<0.5 cm) for rapid permeation [3]. |
| TRIzol Reagent | Monophasic solution of phenol and guanidine isothiocyanate for effective cell lysis and RNA isolation. | Best for difficult tissues high in nucleases (pancreas) or lipid content (brain, adipose) [3]. |
| PureLink RNA Mini Kit | Column-based silica membrane method for purification of total RNA. | Easiest and safest method for most standard sample types (e.g., cell lines, most tissues) [3]. |
| PureLink DNase Set | Contains DNase I to digest and remove genomic DNA contamination. | Used "on-column" during RNA purification for efficient removal of DNA, crucial for applications like qRT-PCR with single-exon primers [3]. |
| RNaseZap Decontamination Solution | A solution that rapidly inactivates RNases on surfaces. | Essential for decontaminating pipettors, benchtops, and other equipment to prevent introduction of environmental RNases [3]. |
| Agilent Bioanalyzer RNA Pico Kit | Microfluidics-based electrophoresis to assess RNA integrity, concentration, and size distribution. | Provides the RNA Integrity Number (RIN), a key quality metric prior to sensitive applications like RNA-seq [110] [3]. |
Logical Workflow: Sample Collection to Data Analysis
The diagram below outlines the critical decision points for handling RNA samples to ensure data integrity.
Experimental Workflow: Evaluating Storage Conditions
This workflow diagrams a systematic experiment to test the effect of pre-analytical variables on RNA, as performed in cardiac tissue research [110].
Conclusion
Solving RNA degradation is not a single step but a comprehensive strategy that integrates foundational knowledge, meticulous methodology, proactive troubleshooting, and rigorous validation. As we advance into 2025, the convergence of automation, novel stabilization reagents, and microfluidic technologies promises to further democratize robust RNA sample preparation. For biomedical research and clinical translation, particularly in burgeoning fields like RNA therapeutics and personalized medicine, mastering these principles is no longer optional—it is fundamental. The future will see these protocols becoming more integrated, accessible, and critical for unlocking the full potential of RNA-based diagnostics and treatments, ultimately ensuring that the quality of the starting material never compromises the promise of scientific discovery.
References
- 1. RNA Degradation in Pluripotent Stem Cells - PubMed Central [https://pmc.ncbi.nlm.nih.gov/articles/PMC12563098/]
- 2. Best practices for RNA storage and sample handling [https://www.qiagen.com/us/knowledge-and-support/knowledge-hub/bench-guide/rna/introduction/general-remarks-on-rna-handling-storage-and-stabilization]
- 3. Top Ten Ways to Improve Your RNA Isolation [https://www.thermofisher.com/us/en/home/references/ambion-tech-support/rna-isolation/general-articles/ten-ways-to-improve-your-rna-isolation.html]
- 4. Commentary: a review of technical considerations for ... [https://pmc.ncbi.nlm.nih.gov/articles/PMC12522984/]
- 5. A comprehensive assessment of RNA-seq protocols for ... [https://bmcgenomics.biomedcentral.com/articles/10.1186/s12864-017-3827-y]
- 6. Impact of RNA degradation on mRNA seq data [https://knowledge.illumina.com/library-preparation/rna-library-prep/library-preparation-rna-library-prep-troubleshooting-list/000002731]
- 7. Recommendations for detection, validation, and evaluation of ... [https://pmc.ncbi.nlm.nih.gov/articles/PMC10772297/]
- 8. Development of an End-to-End Total RNA Sequencing ... [https://www.sciencedirect.com/science/article/abs/pii/S1525157825001436]
- 9. The Basics: RNase Control [https://www.thermofisher.com/us/en/home/references/ambion-tech-support/nuclease-enzymes/general-articles/the-basics-rnase-control.html]
- 10. Optimisation of Sample Preparation from Primary Mouse ... [https://pmc.ncbi.nlm.nih.gov/articles/PMC10417042/]
- 11. Insights Into How RNase R Degrades Structured RNA [https://pmc.ncbi.nlm.nih.gov/articles/PMC2786168/]
- 12. Structured RNAs that evade or confound exonucleases [https://pmc.ncbi.nlm.nih.gov/articles/PMC5388000/]
- 13. RNA degradation triggered by decapping is largely ... [https://pmc.ncbi.nlm.nih.gov/articles/PMC11649920/]
- 14. The effect of nucleic acid modifications on digestion by ... [https://www.neb.com/en-us/tools-and-resources/feature-articles/the-effect-of-nucleic-acid-modifications-on-digestion-by-dna-exonucleases?srsltid=AfmBOop6i9ImNKlJKyzE8WzvTb687jup1qMHUGEBag2vHjQmYw8230Eu]
- 15. Exosome complex [https://en.wikipedia.org/wiki/Exosome_complex]
- 16. Mechanisms of deadenylation-dependent decay - PMC [https://pmc.ncbi.nlm.nih.gov/articles/PMC3624885/]
- 17. Rapid Deadenylation Triggered by a Nonsense Codon ... [https://pmc.ncbi.nlm.nih.gov/articles/PMC162215/]
- 18. Troubleshooting Guide for Total RNA Extraction & Purification [https://www.neb.com/en-us/tools-and-resources/troubleshooting-guides/troubleshooting-guide-for-total-rna-extraction-and-purification?srsltid=AfmBOopQTqD78OE3u2IeN4-GtDa-DFNzJItmvM-pzpXTtlXev1xg8Tin]
- 19. Quantifying RNA Degradation with Single-Molecule ... [https://pmc.ncbi.nlm.nih.gov/articles/PMC12590466/]
- 20. Article RNA Degradation by the Exosome Is Promoted by a ... [https://www.sciencedirect.com/science/article/pii/S0092867405004423]
- 21. An NMD Pathway in Yeast Involving Accelerated ... [https://www.sciencedirect.com/science/article/pii/S1097276503001904]
- 22. RNAscope Troubleshooting Guide and FAQ [https://acdbio.com/technical-support/solutions]
- 23. Post-transcriptional modifications of RNA | Molecular... | Fiveable [https://fiveable.me/molecular-biology/unit-5/post-transcriptional-modifications-rna/study-guide/efLi38nE5E2U9FYR]
- 24. Characterization of nuclease stability and poly ( A )-binding protein... [https://pubs.rsc.org/en/content/articlehtml/2025/cb/d5cb00137d]
- 25. RNA Therapeutics: Delivery Problems and Solutions—A Review [https://pmc.ncbi.nlm.nih.gov/articles/PMC12567017/]
- 26. Current Analytical Strategies for mRNA-Based Therapeutics - PMC [https://pmc.ncbi.nlm.nih.gov/articles/PMC11990077/]
- 27. Optimizing RNA quality in cryopreserved tissues without ... [https://bmcbiotechnol.biomedcentral.com/articles/10.1186/s12896-025-01059-0]
- 28. Effect of temperature and time on RNA detection by RT ... [https://pmc.ncbi.nlm.nih.gov/articles/PMC12232495/]
- 29. Methods of RNA Quality Assessment [https://www.promega.com/resources/pubhub/methods-of-rna-quality-assessment/]
- 30. RNA quantification and quality control methods [https://www.qiagen.com/us/knowledge-and-support/knowledge-hub/bench-guide/rna/rna-analysis/quantification-and-analysis-of-rna]
- 31. RNA Basics: Working with RNA [https://www.thermofisher.com/us/en/home/life-science/dna-rna-purification-analysis/rna-extraction/working-with-rna.html]
- 32. RNase and DEPC Treatment: Fact or Laboratory Myth [https://www.thermofisher.com/us/en/home/references/ambion-tech-support/nuclease-enzymes/tech-notes/rnase-and-depc-treatment.html]
- 33. Precautions for Handling of RNA [https://lifescience.roche.com/global/en/article-listing/article/precautions-for-handling-of-rna.html]
- 34. Avoiding Ribonuclease Contamination [https://www.neb.com/en-us/tools-and-resources/usage-guidelines/avoiding-ribonuclease-contamination?srsltid=AfmBOoog2Ew7crSlf6y3DtzYJ9vEoarS0LVBLzaEEPvzZ-dJiz6iwZqQ]
- 35. Troubleshooting RNA Isolation [https://bitesizebio.com/2345/troubleshooting-rna-isolation/]
- 36. Working with RNA: Hints and Tips [https://www.bioline.com/rna-hints-and-tips]
- 37. Tips for RNA Extraction Troubleshooting [https://www.mpbio.com/us/tips-for-rna-extraction-troubleshooting?srsltid=AfmBOoqGTeILEso7MVedWJ---dI4ZeimaLkcT2zSjSoa2rt0tgJsbyZN]
- 38. Troubleshooting Guide for Total RNA Extraction & Purification [https://www.neb.com/en-us/tools-and-resources/troubleshooting-guides/troubleshooting-guide-for-total-rna-extraction-and-purification?srsltid=AfmBOorED3MiiZdC-MPYf4DLv9f8QDgerHrmHsTg0BUYh647SdFlrf4H]
- 39. Impact of soft tissue homogenization methods on RNA quality [https://pmc.ncbi.nlm.nih.gov/articles/PMC12031802/]
- 40. Method Optimization for Extracting High-Quality RNA From ... [https://www.sciencedirect.com/science/article/pii/S1936523318300925]
- 41. Effective Mixed-Type Tissue Crusher and Simultaneous ... [https://www.mdpi.com/2571-8800/8/1/3]
- 42. Getting Cell Lysis Right in Gene Therapy Manufacturing [https://themedicinemaker.com/issues/2025/articles/october/getting-cell-lysis-right-in-gene-therapy-manufacturing/]
- 43. How Cell Lysis & Disruption Works — In One Simple Flow ... [https://www.linkedin.com/pulse/how-cell-lysis-disruption-works-one-simple-flow-am4zf/]
- 44. Common Problems & Quick Fixes : Homogenization Lab [https://homogenizationlab.exblog.jp/35363710]
- 45. Troubleshooting Common Issues with Industrial Mixer ... [https://www.yuxiangmachinery.com/article/detail/troubleshooting-common-issues-with-industrial-mixer-homogenizers-3.html]
- 46. How to troubleshoot when the homogenizer mixing pump ... [https://www.bonvepumps.com/blog/how-to-troubleshoot-when-the-homogenizer-mixing-pump-fails_b49]
- 47. Phenol-Chloroform, Silica Spin Column, Magnetic Beads [https://www.lunanano.com/post/comparing-nucleic-acid-purification-methods-phenol-chloroform-silica-spin-column-magnetic-beads?srsltid=AfmBOoo_t7yXWJp0PjYhgZtqD2XrrqwWlneRNxPH5txzjAWSgrC66PXs]
- 48. Comparison of commercial RNA extraction kits and qPCR ... [https://pmc.ncbi.nlm.nih.gov/articles/PMC5735310/]
- 49. Common Issues and Troubleshooting in RNA Extraction Using ... [https://www.yeasenbio.com/blogs/molecular-biology/common-issues-and-troubleshooting-in-rna-extraction-using-trizol]
- 50. Tips for RNA Extraction Troubleshooting [https://www.mpbio.com/us/tips-for-rna-extraction-troubleshooting?srsltid=AfmBOooSbJP8GinUUpMH58rB4L1cf27CaLFtuKyua8Ce3lPulTQd4dgC]
- 51. Troubleshooting Guide for Monarch Spin RNA Isolation Kit ... [https://www.neb.com/en-us/tools-and-resources/troubleshooting-guides/troubleshooting-guide-for-monarch-spin-rna-isolation-kit-mini-neb-t2110?srsltid=AfmBOoqSLhi7IHXtVPFmAswcjksm-yyQSS4-fr3mXQqvwPvQ6YgRPfSi]
- 52. RNA preservation in human dental pulp for transcriptomic ... [https://pmc.ncbi.nlm.nih.gov/articles/PMC12592039/]
- 53. RNA Sample Collection, Protection, and Isolation Support ... [https://www.thermofisher.com/us/en/home/technical-resources/technical-reference-library/nucleic-acid-purification-analysis-support-center/rna-sample-collection-protection-isolation-support/rna-sample-collection-protection-isolation-support-troubleshooting.html]
- 54. RNAlater FAQs | Thermo Fisher Scientific - US [https://www.thermofisher.com/us/en/home/references/ambion-tech-support/rna-isolation/tech-notes/rnalater-faqs.html]
- 55. RNAlater™ Stabilization Solution with Manual - FAQs [https://www.thermofisher.com/order/catalog/product/AM7023M/faqs]
- 56. Tips for RNA Extraction Troubleshooting [https://www.mpbio.com/us/tips-for-rna-extraction-troubleshooting?srsltid=AfmBOopySDJH-oquUu2xfXgxjPpMwnRVVVzHTme2IhwI0Mvpvq4HP8Os]
- 57. RNAlater Solutions for RNA Stabilization and Storage [https://www.thermofisher.com/us/en/home/brands/product-brand/rnalater.html]
- 58. Isolating high-quality RNA for RNA-Seq from 10-year-old ... [https://www.nature.com/articles/s41598-024-80287-4]
- 59. Tips & Tricks For RNA Isolation [https://www.zymoresearch.com/blogs/blog/tips-tricks-for-rna-isolation?srsltid=AfmBOoqa2cuOERR5kbGOZQd1B9qA9QbJo5tAxeO_C-CE69Cb5by2Hd6z]
- 60. Troubleshooting Guide for RNA Cleanup [https://www.neb.com/en-us/tools-and-resources/troubleshooting-guides/troubleshooting-guide-for-rna-cleanup?srsltid=AfmBOopQCGLdD922Igcwa9ZPQpXYxKpUGBPVlVzTtYCOjC520O53hZvz]
- 61. RNA sample may be of poor quality [https://www.thermofisher.com/us/en/home/life-science/pcr/real-time-pcr/real-time-pcr-learning-center/real-time-pcr-basics/real-time-pcr-troubleshooting-tool/gene-expression-quantitation-troubleshooting/abnormal-amplification-curves/amplification-occurs-later/rna-sample-may-be.html]
- 62. Environmental RNA‐Based Metatranscriptomics as a ... [https://pmc.ncbi.nlm.nih.gov/articles/PMC12617048/]
- 63. Targeted RNA Degradation as a Promising Therapeutic ... [https://pmc.ncbi.nlm.nih.gov/articles/PMC12608330/]
- 64. Smart drug strikes a hidden RNA weak point in cancer cells [https://www.sciencedaily.com/releases/2025/11/251112111033.htm]
- 65. RNA Integrity Assessment: Why RIN Numbers Matter in ... [https://synapse.patsnap.com/article/rna-integrity-assessment-why-rin-numbers-matter-in-your-research]
- 66. Investigating the impact of RNA integrity variation on ... [https://pmc.ncbi.nlm.nih.gov/articles/PMC9259771/]
- 67. Nucleic Acid Gel Electrophoresis Troubleshooting [https://www.thermofisher.com/us/en/home/life-science/cloning/cloning-learning-center/invitrogen-school-of-molecular-biology/na-electrophoresis-education/na-electrophoresis-troubleshooting.html]
- 68. Troubleshooting Nucleic Acid Gel Electrophoresis—Solved in ... [https://www.yeasenbio.com/blogs/molecular-biology/troubleshooting-nucleic-acid-gel-electrophoresis-solved-in-one-go]
- 69. 5 Ways to Really Screw Up Your RNA Prep [https://bitesizebio.com/13537/5-ways-to-really-screw-up-your-rna-prep/]
- 70. Impact of RNA degradation on next-generation sequencing ... [https://www.sciencedirect.com/science/article/pii/S0888754322001744]
- 71. What troubleshooting is there if smears or non-specific ... [https://pcrbio.com/resources/faqs/ultrascript-2-0-reverse-transcriptase/what-troubleshooting-is-there-if-smears-or-non-specific-products-are-visible-after-using-ultrascript-2-0-rtase/]
- 72. RNA Preparation Troubleshooting [https://www.sigmaaldrich.com/US/en/technical-documents/technical-article/genomics/dna-and-rna-purification/troubleshooting-rna-preparation?srsltid=AfmBOopHN_XGw5XjVRp04LxCbrqEwi-A0_iP3a6sZF7J-typC2ISIud9]
- 73. DNase Treatment & Removal Reagents [https://www.thermofisher.com/us/en/home/references/ambion-tech-support/rna-isolation/tech-notes/a-new-method-to-remove-dna.html]
- 74. DNase Treatment in RNA Extraction: Essential or Optional? [https://www.lexogen.com/blog/rna-lexicon-dnase-to-treat-or-not-to-treat/]
- 75. DNase, a powerful research tool for DNA manipulations [https://www.thermofisher.com/us/en/home/references/ambion-tech-support/nuclease-enzymes/general-articles/dnase-i-demystified.html]
- 76. Elimination of bacterial DNA during RNA isolation from ... [https://pmc.ncbi.nlm.nih.gov/articles/PMC6438495/]
- 77. DNAse I qualification and sample treatment [https://www.moleculardevices.com/en/assets/app-note/reagents/dna-dnase-i-qualification-and-sample-treatment]
- 78. Troubleshooting Guide for Total RNA Extraction & Purification [https://www.neb.com/en-us/tools-and-resources/troubleshooting-guides/troubleshooting-guide-for-total-rna-extraction-and-purification?srsltid=AfmBOoqkV_PJ7VWCzNcl1rD-9jo0XdVk7evntdn-Ffa82ExiJSEfNdk3]
- 79. Tips & Tricks For RNA Isolation [https://www.zymoresearch.com/blogs/blog/tips-tricks-for-rna-isolation?srsltid=AfmBOoossATsiY6ochimnHtmIiWBAYAleJKfxwCuoXHyQWj9lVH__DOV]
- 80. The Basics: RNA Isolation [https://www.thermofisher.com/us/en/home/references/ambion-tech-support/rna-isolation/general-articles/the-basics-rna-isolation.html]
- 81. Effect of pH and ionic strength on the spectrophotometric ... [https://pubmed.ncbi.nlm.nih.gov/9067025/]
- 82. Troubleshooting Guide for Total RNA Extraction & Purification [https://www.neb.com/en-us/tools-and-resources/troubleshooting-guides/troubleshooting-guide-for-total-rna-extraction-and-purification?srsltid=AfmBOootAzW7F7OSTVNhEAvVzTlp92R33Fio4UKkh1BGzTwfktbkGeYc]
- 83. Functional phenotyping of genomic variants using joint ... [https://www.nature.com/articles/s41592-025-02805-0]
- 84. Defining an Optimized Workflow for Enriching and ... [https://pmc.ncbi.nlm.nih.gov/articles/PMC12178326/]
- 85. RNA quality control: 3 Key Considerations [https://bitesizebio.com/13527/how-to-quality-control-check-your-rna-samples/]
- 86. Troubleshooting Guide for Total RNA Extraction & Purification [https://www.neb.com/en-us/tools-and-resources/troubleshooting-guides/troubleshooting-guide-for-total-rna-extraction-and-purification?srsltid=AfmBOopjiLSovQyZfvL4feDqqwHo-xXr3iYdt8WX5AsDlJn5Y3VmL2R1]
- 87. Evaluation and Standardization of RNA Extractions with ... [https://www.mdpi.com/2673-6772/4/2/17]
- 88. Troubleshooting Guide: RNA Extraction for Sequencing [https://rna.cd-genomics.com/resource/troubleshooting-rna-extraction.html]
- 89. Analysis of RNA Yield, Integrity, and Purity [https://www.biopharminternational.com/view/validating-rna-quantity-and-quality-analysis-rna-yield-integrity-and-purity]
- 90. Sample Preparation for High-Quality Sequencing Results [https://www.cd-genomics.com/resource-sample-preparation-for-sequencing.html]
- 91. Troubleshooting Guide for Total RNA Extraction & Purification [https://www.neb.com/en-us/tools-and-resources/troubleshooting-guides/troubleshooting-guide-for-total-rna-extraction-and-purification?srsltid=AfmBOorur6LXZg-aqqUoOyvo0hODO8ufs2XA29g90wS12TE_oT45hQNq]
- 92. RNA integrity and quantification [https://gene-quantification.com/rna-integrity1.html]
- 93. Sample Preparation for NGS – A Comprehensive Guide [https://frontlinegenomics.com/sample-preparation-for-ngs-a-comprehensive-guide/]
- 94. Obtaining Reliable RT-qPCR Results in Molecular ... [https://pmc.ncbi.nlm.nih.gov/articles/PMC8953338/]
- 95. Troubleshooting Guide for Total RNA Extraction & Purification [https://www.neb.com/en-us/tools-and-resources/troubleshooting-guides/troubleshooting-guide-for-total-rna-extraction-and-purification?srsltid=AfmBOorWhl4GuRxh5onOKs90Gmu12owOoO4IERixP3BGhuOwCUfmdN5o]
- 96. Troubleshooting Guide for RNA Cleanup [https://www.neb.com/en-us/tools-and-resources/troubleshooting-guides/troubleshooting-guide-for-rna-cleanup?srsltid=AfmBOoopAifsUYmZsRJP3nQi5piXJVuwzQWIl4hYxblNvfV7s21ICP_c]
- 97. A comparative analysis of library prep approaches for ... [https://bmcgenomics.biomedcentral.com/articles/10.1186/s12864-018-5066-2]
- 98. Recent advances in RNA sample preparation techniques for ... [https://pmc.ncbi.nlm.nih.gov/articles/PMC10204347/]
- 99. Troubleshooting Degraded Bioanalyzer RNA Ladder or ... [https://community.agilent.com/knowledge/automated-electrophoresis-portal/kmp/automated-electrophoresis-articles/kp1258.troubleshooting-degraded-bioanalyzer-rna-ladder-or-samples]
- 100. Tips & Tricks For RNA Isolation [https://www.zymoresearch.com/blogs/blog/tips-tricks-for-rna-isolation?srsltid=AfmBOooVGkAl_cwlQe2YkfHdya6PSVyqjPZpIJANildALT1Kef-zcDLy]
- 101. Machine learning-enhanced microfluidic CircRNA ... [https://www.sciencedirect.com/science/article/abs/pii/S1385894725104683]
- 102. Microfluidic Platforms for Ex Vivo and In Vivo Gene Therapy [https://pmc.ncbi.nlm.nih.gov/articles/PMC12384408/]
- 103. Reverse transcription troubleshooting guide [https://www.thermofisher.com/us/en/home/life-science/cloning/cloning-learning-center/invitrogen-school-of-molecular-biology/rt-education/reverse-transcription-troubleshooting.html]
- 104. The impact of RNA degradation on next-generation ... [https://www.rna-seqblog.com/the-impact-of-rna-degradation-on-next-generation-sequencing-transcriptome-data/]
- 105. Effects of disease severity on RNA integrity measures in ... [https://www.sciencedirect.com/science/article/abs/pii/S187493992500046X]
- 106. Effects of disease severity on RNA integrity measures in ... [https://pubmed.ncbi.nlm.nih.gov/41223942/]
- 107. Discovery of RNA‐Targeting Small Molecules - PubMed Central [https://pmc.ncbi.nlm.nih.gov/articles/PMC12375692/]
- 108. Targeting RNA with small molecules using state-of-the-art ... [https://www.nature.com/articles/s42003-025-08809-y]
- 109. RNA Therapeutics: Delivery Problems and Solutions—A ... [https://www.mdpi.com/1999-4923/17/10/1305]
- 110. RNA degradation patterns in cardiac tissues kept at different ... [https://journals.plos.org/plosone/article?id=10.1371/journal.pone.0323786]